

Like most people will tell you, I live in kind of an abstract world. I don't like, as a general rule, to be troubled with the details of the phyical world around me instead much preferring the space in my head where I am free to contemplate the intracies of my navel. There are, however, a few things that will bring me out of the abstract and back down to reality.
Tires, for instance.
Tires are important. To many, tires are religion and there are countless holy wars fought over the subject.
Whether you are in a truck, a car, or on a motorcycle tires act as the interface between your vehicle and the ground. The amount and composition of tire rubber that meets the ground combined with tread pattern and temperature determines how much traction you have in a given situation. Clearly, on a motorcycle, traction is key.
The area where the rubber meets the road is referred to as the "contact patch". You'll notice that on car tires the bottoms are squared off, if you look at it from the front of the car. This allows the tire to touch the road from sidewall to sidewall maximising the amount of rubber that touches the road. Even when cornering, it's the bottom of the tire that remains on the road. The tire never rides up on it's sidewalls. Well, at least not unless Very Bad Things(tm) have happened. The wider the tire, the greater the "contact patch", the more traction, the faster one can go around a corner without sliding. This is why you see sports cars have much wider tires than normal passenger automobiles.
Motorcycle tires are fundamentally different. First, because motorcycles have just two tires, the amount of rubber meeting the road is reduced. Additionally, the size of the tires is much smaller further reducing the contact patch. Beyond that, unlike a car, a motorcycle leans when it corners. This dictates that the profile of the tire as viewed from the front must be rounded off so that the bike can actually lean. As a result the contact patch is further reduced down to an area of just a few square inches. That's the entire area available for traction whether accelerating, decelerating or cornering.
As anyone who knows me will tell you, I'm a bit fanatical when it comes to tires. Traction is a good thing especially when Bad Things happen as they do from time to time. My feeling is that to the greatest degree possible I want as much traction out of the contact patch as I can get. But there are unfortunate trade-offs as seems to always be the case in the physical world.
One tradeoff is the compound that makes up the tire. In order to make a long lasting tires, one has to use harder compounds. Unfortunately, the harder the compound the less "sticky" it is, the less traction it has. Conversely, the softer the compound, the "stickier" it is, the shorter it will last.
For example, the hardest tire that I have any experience with is the Metzler Marathon series. These are super hard tires that last for well over 10,000 miles and are designed for long distance and very heavy bikes. You'll see them on Goldwings. I don't like them because in my humble opinion they are too hard and don't offer the kinds of traction that I like to have. The Screaming Chicken, which I will write about soon, runs them. It's funny how after a while you can really feel the difference in types of tires.
On the opposite end of the street spectrum you have full sport tires like the Michelin Pilot Power 2CT. It's a very sticky high traction tire but will likely only last 2500 to 3000 miles.
Another tradeoff has to do with riding conditions. The more sport oriented a tire, the less likely it is to be designed to handle varied weather conditions. Think of a Porsche in the snow. Yea, not a pretty sight. The ability of the tire to displace water without losing traction is a tradeoff. To displace water one needs more tread grooves but those tread grooves remove rubber from the contact patch. For dry clean conditions like you see on a racetrack you might have noticed guys running slick tires without any tread pattern on them. This provide maximum traction in dry conditions but are completely useless in the wet.
So tires are a tradeoff.
Another problem is if you mostly do around town and highway riding the center of the tire will get vastly more usage than edges simply because you have little opportunity to lean the bike over. This will cause the tire to "square off" which then produces a dangerous situation where, when you lean on that squared off edge, the contact patch is suddenly significantly reduced. It also feels awfully squirrelly as the bike starts to lean onto the squared off edge.
For sport touring riders like myself a new kind of tire has been introduced in the last decade or so called the "dual compound" tire. It has a harder compound in the center where you spend most of your straight up and down riding time and much softer compounds on the sides to provide more traction for cornering. The Pilot Road 2 by Michelin is such a tire. These are the tires I run now and I've been getting about 6000 miles out of a set before they square off.
Another tradeoff in tire design has to do with operating temperature. Tires when cold are less sticky and provide less traction than tires that are warmed up. It usually takes several minutes on a warm day for tires to warm up to their target temperature where they have maximum traction. It can take significantly longer on a day when it's cold or raining. When I start a ride I usually take it pretty easy for the first 5 or 10 minutes to give the tires some time to warm up. Sometimes you'll see racers at a track use "tire warmers" to pre-heat tires before a race so they have 100% of the available traction at the start.
How quickly a tire warms up under what conditions is another design compromise.
On a trip down to Deal's Gap I was talking to a racer about tires. He mentioned that many inexperienced riders will run full not-street-legal racetrack tires thinking that it provides some kind of benefit. As the racer explained to me, full race tires are designed to handle super high speeds and mega-aggressive cornering. As a result, it takes a lot more to "warm them up" than the comparable street tires. As a matter of fact, the racer said, in street riding conditions a race tire will never reach it's target temperature thus providing /less/ traction than the comparable street tire in those conditions. I haven't researched it, but this is what I was told. It seems to make sense.
The last aspect that I'm aware of with regard to tires has to do with heat cycles and age. Tires age just sitting on a shelf. Over time they get harder and lose traction just by off gassing. Once on a bike there are only so many times the tires can heat up and cool down before it starts to get lose it's stickiness, even when there is still significant tread life left on the tire. As an experiment, last season we ran a set of tires down to Deal's Gap that had been run the previous year. Bruce said he could really notice the difference as the bike didn't feel nearly as planted. Lesson learned. I change tires every year now before the trip to the Gap. If, or should I say when, I do track days this year I'll run fresh tires on each. I imagine those with significantly more experience in these matters than I can provide more nuanced perspectives.
As many know, financially things have been a little challenging. My business has tanked and the projects I had attempted to build up over the last year and a half since I came back from my trip have failed. My business partner and I have essentially parted ways as he's wandered off to get a full-time W-2 position. The horror.
Without much money coming in the door, my context has changed and jobs that made no sense for me to do myself suddenly make a lot of sense. Changing tires is one of them. I have over all the years that I've been riding motorcycles only participated in changing one tire. With Yun now riding regularly we have four bikes that will need regular tire changes. With what will hopefully be expanded motorcycling this year, there may be multiple sets that need to be done. The amount of money that can be saved by changing my own tires can really add up.
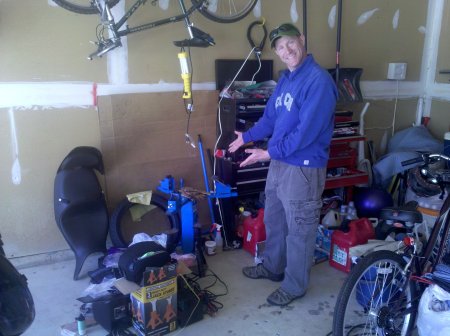
So it came to pass that Josh, who like Yun thinks about these things much more than I do, has forged ahead, purchased a tire changer and balancer, and learned how to change his own tires. On Saturday he invited me down so I could see the process and learn how to do it myself. He evilly thought this was a way of getting free labor. He was entirely correct.
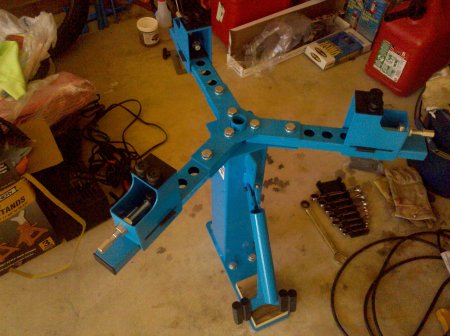
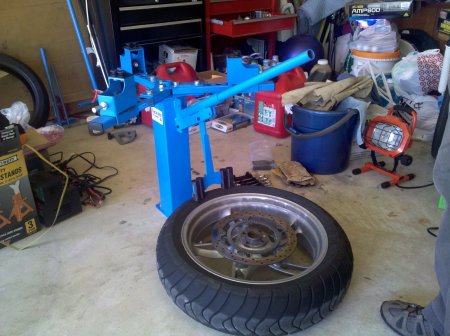
Josh purchased the No-Mar Cycle Hill Motorcycle Tire Changer off a commercial listing on Ebay. He suggested getting it from Ebay since you get the scratch proof bead breaker with it which normally costs extra.
The tire changer needs to be mounted on the floor which was a concern of mine since I don't have enough spare room in my garage to permanently mount a tire changer. The solution Josh came up wtih seems to work very well.
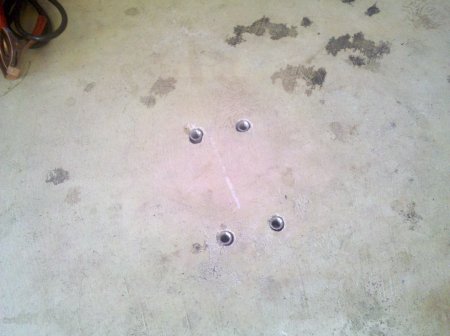
He drilled four oversized holes in the floor using, I think it was called, a hammer-drill with a concrete bit. He mentioned he destroyed the bit in the process. He then installed from threaded sleeves. I failed to ask him how he secured the sleeves in the hole. I will try to remember to ask him.
With this setup, it's a very straightforward process to mount the changer when one needs to work on tires.
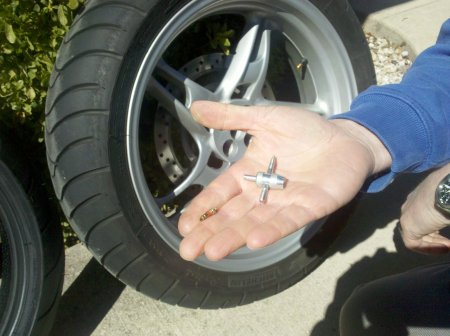
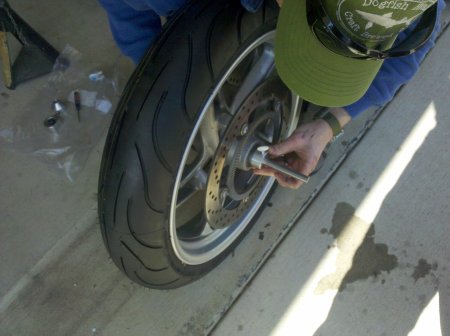
After removing the wheels from the bike, the first step is to remove the valve and let out the air in the tire. Josh chose to remove the valve directly. Please wear safety googles! The air pressure can cause the stem to shoot out. When I do this process here, I'll depress the valve and let the air out first before removing the valve.
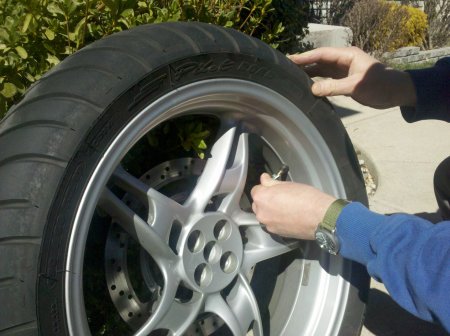
To remove the valve you need a little tool you can get at the auto-parts store, a valve remover.
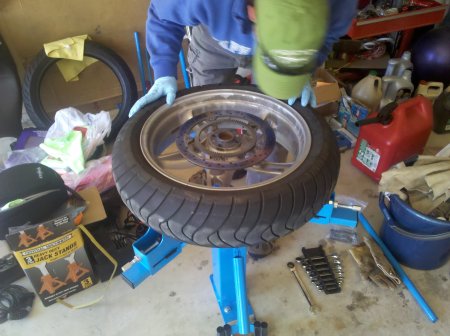
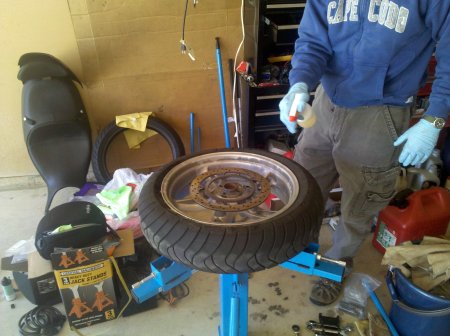
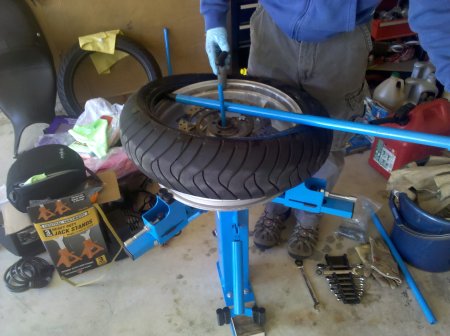
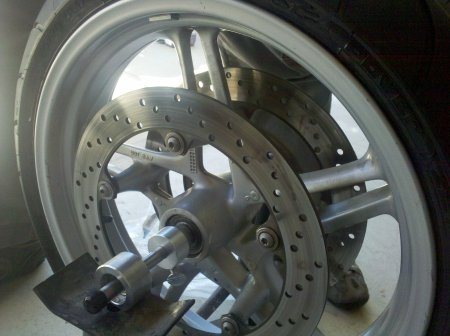
Once mounted the tire makes a hard seal on the rim. It forms a "bead" on the rim. The bead must be "broken" to remove the tire from the rim. It requires a somewhat brutal application of force. The wheel with the deflated tire is placed under the bead breaker.
A word to the wise, this entire job goes MUCH more easily if the tires are warm. Josh left both the wheels and new tires in the sun for quite some time. I will probably use my blast furnance to heat up the tires to make them more pliable. I doubt that one additional heat cycle from this will make much difference but I'll have to do some checking.
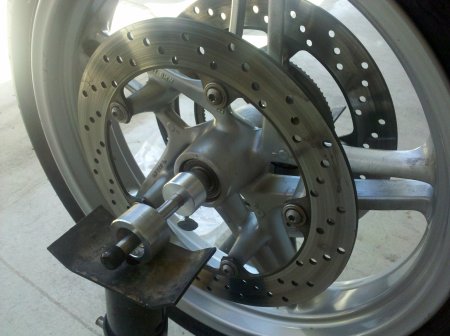
It's important to note, while it's not depicted in this photo that if the wheel has brake disks on both sides it needs to be raised up off the ground with a 2x4 or something similar so that when you apply force with the bead breaker you do not transmit any of that force onto the brake disk.
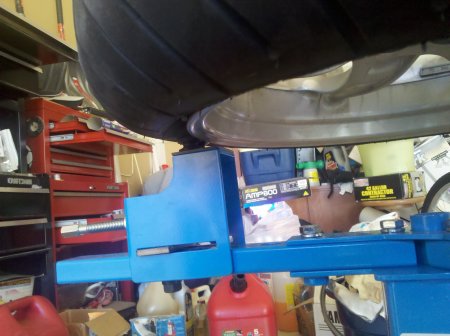
It's just a matter of lining up the tool and applying lots of force.

The rubber of the tire will contort. I haven't researched it but my understanding is that if the tires aren't too old one can mount and unmount them like this without ill-effect. Looking at how the tire deforms when this occurs it makes one wonder.

You have to work your way around the tire on both sides to make sure the bead is broken all the way around.
Once the bead is broken the tire is mounted to the changer. There are rollers that line up on the rim to hold it into place. These get tightened down good and tight as they are the only thing holding the wheel in place as you try to remove and reinstall the tire.
We had quite a bit of trouble with the wheel wanting to spin around while working on it.
You can see how the rollers, center, fit onto the rim.
And, as Josh will not let you forget, many things are much easier when properly lubricated.
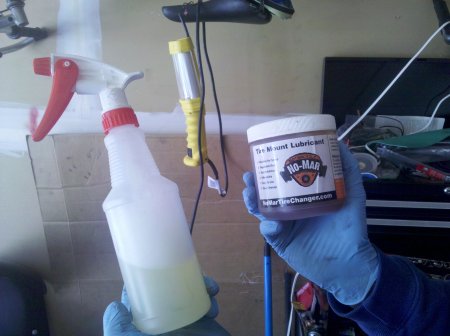
The changer comes with a lubricant that makes getting the bead edge of the tire over the rim much easier. You use it in two forms. One as a spray on liquid and the other as a grease.
First you spray the bead edge.
Then you use a clamp to push the bead edge of the tire down to make it easier to get the de-mounting tool under the lip.
Working with the de-mounting bar is by far the most challenging part of the job. It has a hook on the end. You shove the tool between the rim edge and the tire bead edge, turn the tool 90 degrees and try to pull the bead over the edge of the rim. The tip of the de-mount tool seemed a bit fragile for the job. My impression is that given the force exerted on it that it might break. Maybe that is why they provide a second one with the changer.
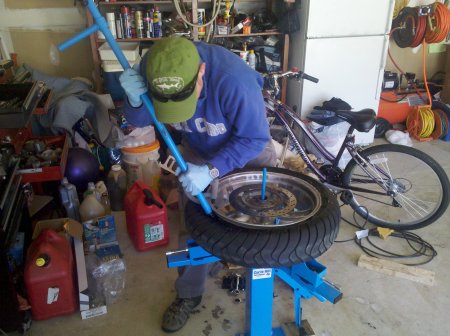
Once you get the de-mount tool in and the first section of the bead over the rim you forcefully pull the de-mount tool around the perimeter of the rim. The wheel kept wanting to turn when we did this.

This took us a bit of time and was without a doubt a two person job. Read: Pain in the ass but entirely doable.
Once we had the first bead off the rim the next one pulled off without much troube.
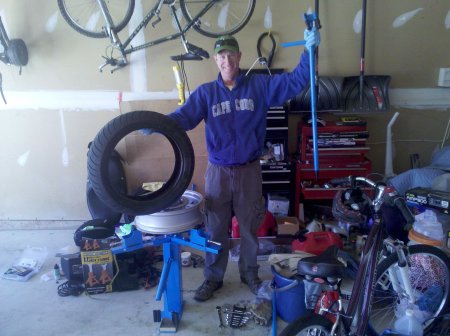
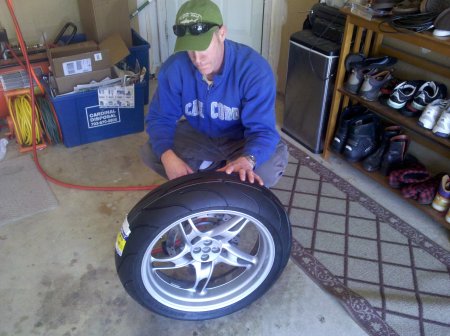
"Honey, look, see what I killed? ", the triumphant hunter exclaims. His wife and daughter did not seem impressed.
While the rim is off it should be cleaned.
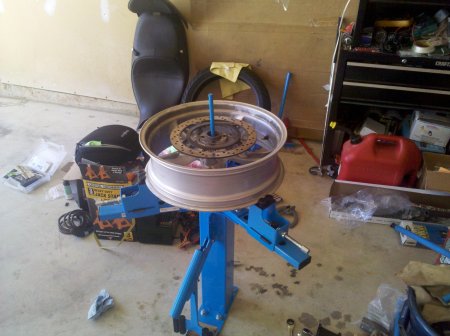
And then in order to make the job go much more smoothly the rim should be lubricated with the goop.

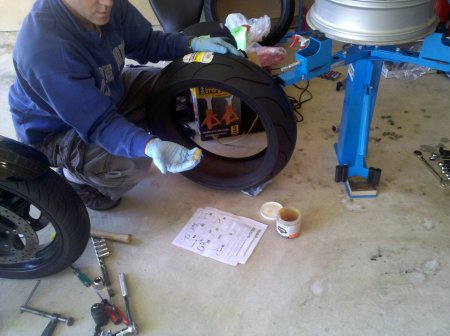
In addition, the inside bead edge of the new tires should have goop applied to it liberally.
Then comes the second difficult part of the job. The mount tool looks like the demount tool except it two tips separated by a few inches. The process is pretty much the reverse of the de-mount. You shove the tool in grabbing the lip of the rim and then you attempt to force the tool around pushing the bead edge of the tire over the lip of the rim. This was also a pain in the ass. The last section required quite a bit of force.
But once you get the hang of it it becomes much easier.
Tada!
The bead edge of the tire was pushed in in places. To get it to "pop" out and make a good seal against the rim we used a compressor and while applying air bounced the wheel on the tire a bit. Eventually with two distinct pops the tire snapped into place and started accepting air.
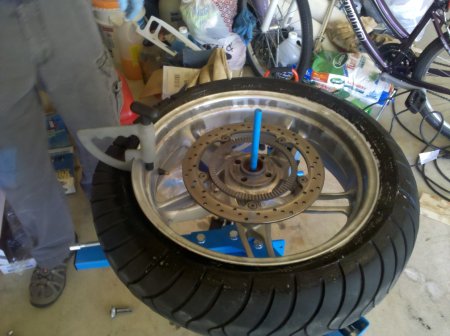
Tire mounted. But before the wheel can be re-installed on the bike the wheel must first be balanced.
Tires and wheels are not perfectly uniform in density. As a result, there tends to be a heavy side and a light side. If this discrepency in weight is not accounted for the wheel will shake violently as you ride. Imagine a laundry machine with an unbalanced load and you see the the problem.
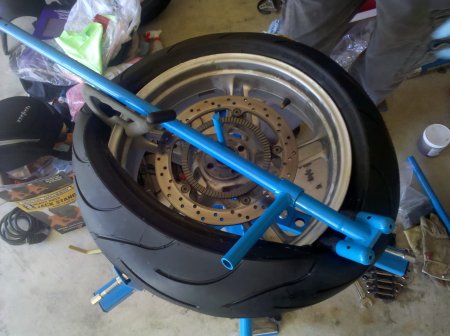
So the idea is you attach weights to offset the imbalance to bring the wheel back into balance. For this you need a "Wheel Balancer". The one Josh got is Marc Parners Balancer for BMW's (BML). There's not much to it. It's a rod, some cones and two bases. The idea is you shove the rod through the center of the wheel, clamp down the cones on each side to support the wheel so it spins freely. You then slip on the bases and support the whole assembly on a couple of jack stands.

The cones are tightening with thumb screws. It should be noted that the thumb screws need to be on opposites side of the shaft so that the tool itself is not imbalanced. (i.e. thumb screw on the left side should face up and the one of the other side should face down.)
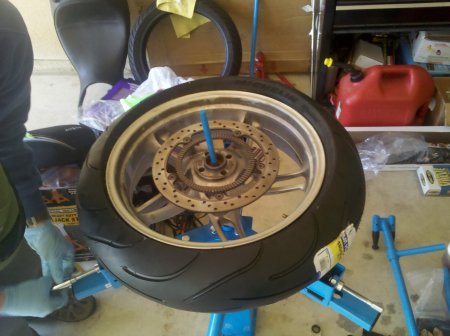
The the whole assembly is put onto jack stands. You have to make sure the cones are secure. If there's any slippage it affects how the wheel rotates and you won't get a good balance.
You then spin the wheel and watch it. If it spins then slows down and reverse direction the wheel is out of balance. You wait until it settles. This should mean the heavy spot on the wheel is at the bottom. You stick a weight on the top to compensate. You can see weights like this on your car wheels as well. If, as you're driving down the road you feel a shake, there's a good chance your wheels are out of balance. Sometimes weights fall off.
We repeated this process until the wheel simply stopped after spinning. It was remarkable how obvious it was.
I had run a timer during the process. To remove the tires and remount them took 54 minutes. Much of that time was spent explaining to me what was being done. Balancing took another 25 or so minutes. It may have taken another 30 to put the wheels on the bike. Based on this experience my feeling is that after a few times a bike could be done with two people in under two hours.
After thinking about it, I realized just taking the bike up to Bob's BMW to have the tires changed takes more time out of my life than this. I will be placing an order for the tire changer and balancer shortly.
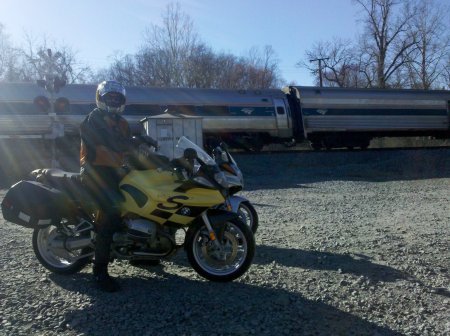
Once we finished we took the bike out for a test run down the road where a buddy of mine crashed. "I don't like that road.", Josh commented. As I was snapping a photo, a train passed by. Pretty cool.
Josh had decided to try the Michelin Power Power 2CT tires which are a much softer compound tire than the Pilot Road 2's I've been running. After scuffing the tires in a bit he let me ride his R1100S on a twisty local road. Of course, his bike has Ohlin's shocks on it so any comparison to my R1100S bike is going to be questionable at best but I must say the new tires felt really good. I'm tempted to put them on my 'S as well. And despite the lack of income I am very tempted to slap some Ohlins shocks on my bike as well prior to Deal's Gap in May.
Now, as I mentioned above, this was my very first time doing a job like this. I am by no means an expert on the subject of tires and maybe not even motorcycles. I'm thinking I'll let loose the dogs of war and ask the super-knowledgeable guys from the BMW Tech list if they might give this artcle a once over to see if I am making any huge glaring errors.
If you liked this article, or any of the others I've written, please "like" Miles By Motorcycle on Facebook using the Facebook badge above or at the Miles By Motorcycle Facebook Page.
 Yermo12 years ago
I contacted the manufacturer and they suggested that we were having a more difficult time than we should have been and further suggested that we should watch these videos for the proper technique. They say it's easily a one man job. I will give this a try once I get my changer bolted down:
http://www.youtube.com/user/nomartirechanger AGrip11 years ago
Yes, easily a job for one person, once you get the hang of it. I think I've gotten the whole thing down to a fairly quick procedure. Just have to remember the little things, like letting the air out of the tires.
 Robermcm5 years ago
Good stuff. Thanks yermo. +1 on No-Mar and Marc Parnes.
my buddy has that same tire changer. Practice makes perfect, and it gets easier. Our experience was like yours. P.i.t.a. First,couple of times, then it seemed to flow better.
couple of additions to your accurate instructions. There is a yellow no-mar clamp that helps stop the tire from spinning on both dismount and mount. Like an extra hand, and super helpful when you’re alone. GSA spoke rims, with the extra wide rims benefit from a No-Mar accessory that makes the 3 rim clamps larger. Some tires have a mark that’s white/red/a dot that is apparently the lightest part of the tire. Make sure you mount that right next to the valve stem to minimize the weights you’ll need to balance.
ALWAYS change your valve stems when you put on a new tire. Ask me how I know. And you can’t patch a torn valve stem out in the middle of nowhere without either an emergency outside-in stem (recommended carry item) or a spare stem and a bead breaker/compressor. I tried and failed.- Yermo5 years ago
Huh. I had not heard about changing tire stems before. I typically have left them in and have yet to run into an issue but I will take it under advisement.
I should update the article with everything I've learned in the interim since that first time. I've since gotten my own and have the same floor mounting system set up in my garage.
And thanks for the reminder that I need to buy new clamps since the coating on my existing one has failed and tends to scuff up rims if I'm not super careful. :) - Robermcm5 years ago
I ride a fair amount of gravel and dirt, which may be a problem for valvestems. My Harley went 10 years without a new one. But one stranding far from anywhere and I’m converted! Haltec QS-430 is about $16 for insurance.

You must be a member of this group to post comments.
Please see the top of the page to join.