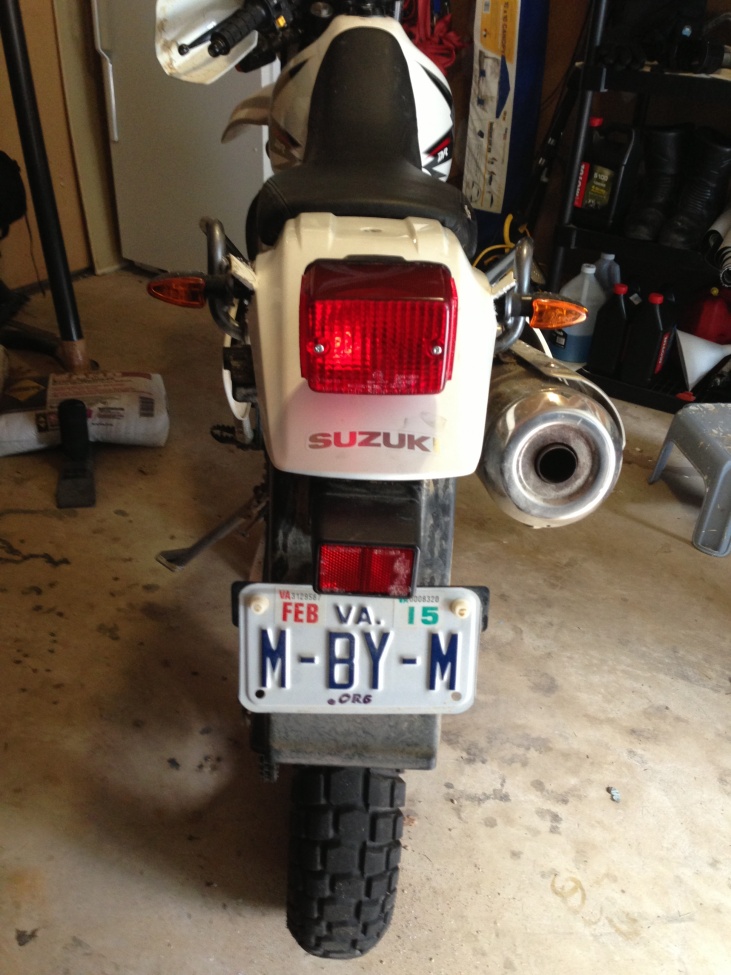
The Original Miles-By-Motorcycle Group
established 11 years ago

You must be logged in and belong to this group to post to this forum.
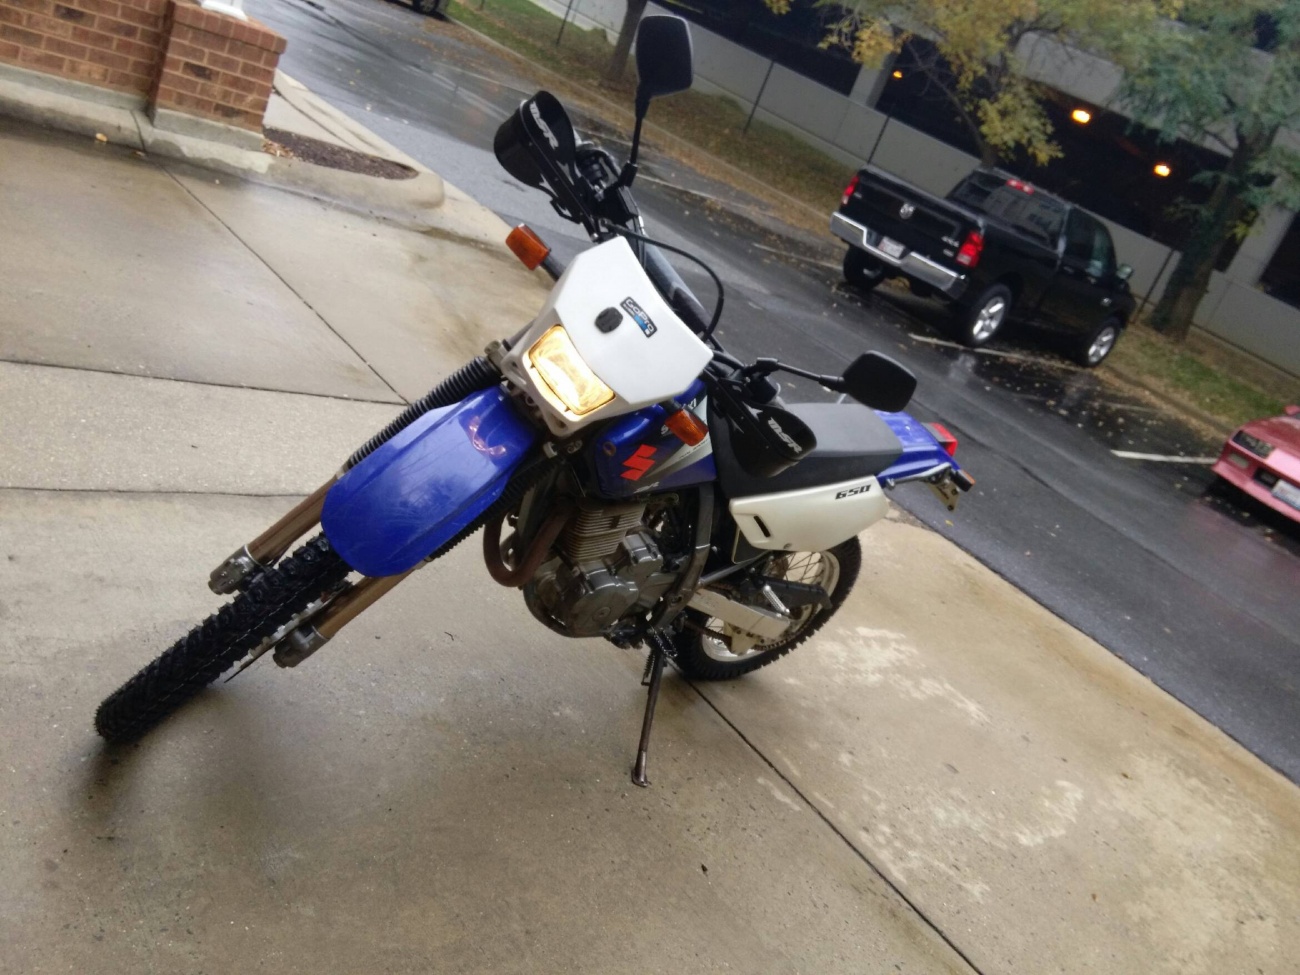
So doing strictly street mileage on the last tank I only got 38 miles per gallon. This is quite a far cry from the 50 to 60 this bike is "supposed" to get.
That's less than I would have guessed. My Monster averages about 50mpg. Maybe that's why they sell such huge aftermarket fuel cells for those bikes.
 Yermo I'm routinely getting in the 40's and 50's on mine, while treating it poorly. Do you have aftermarket engine parts or has the gearing been altered? Just going up a tooth or two in the rear sprocket would be enough to effect mileage.
Also, if your at "highway speeds", there is no aerodynamic efficiency at all on the DR. 30-50MPH seems to be a mileage sweet spot.
Yea, the bike came with a larger rear sprocket and it has an after-market exhaust. The dealer claimed the carb had been re-jetted to match the freer flowing exhaust.
I wouldn't have guessed that it would have made that much of a difference since I've read repeatedly that these bikes are supposed to get between 50 and 60.
Learn something new every day, I guess.
I wouldn't have guessed that it would have made that much of a difference since I've read repeatedly that these bikes are supposed to get between 50 and 60.
Learn something new every day, I guess.
Yermogood thread on the subject here: Basically, "Your actual mileage will vary"
 . The general concensus is that the DR will get between 20MPG and 60MPG LOL. that's not at all surprising though considering that it is a relatively large single cylinder, no aerodynamics, with incredible variation in the amount of drag and load applied. Ever accessory adds drag and weight, riders add drag and weight, knobbies add drag and friction induced drag. A, relatively, low horsepower motor will have large swings in efficiency as it deals with load changes. Also it will be far more susceptible to things like bad jetting (or more likely incorrect for the exact current circumstances jetting), gearing changes, etc. I should clarify that my "30-50mph" efficiency comment was steady state throttle, stop and go mileage will be much worse because the engine is never running at peak efficiency while also travelling minimal distance. Internal combustion engines are at maximum efficiency at full load, in steady state travel that tends to equate to velocity which gives higher mileage (the sum of efficiencies exceeds the sum of deficiencies). There will be a velocity though where the aerodynamic and friction loss drag increases to a point where overal efficiency begin to degrade - resulting in ever decreasing mileage. Thus, best mileage is when the engine is operating closest to maximum efficiency, engine work product (horsepower produced) is used for forward velocity (versus "power" to climb obstacles at lower speeds), and all drag forces are minimal. Anything that reduces engine efficiency (for example not running at the correct stoichiometric ratio), reduces velocity per RPM (shorter gearing), or increases negative forces (friction and drag), will result in lower MPG.
If higher mileage is a goal for you I would start with taller gearing (sprocket change), trying different jetting needles, and looking for friction. Carbs are awesome except when they aren't, worth you taking them apart and rejetting them for YOU'RE desired results if they aren't right.
Some pics from replacing the rear indicator lamps on the Mighty DR. This was a great cheap fix for the stock indicators, which can be surprisingly brittle when struck.
Step one is to basically take off the body work, very easy on the DR.
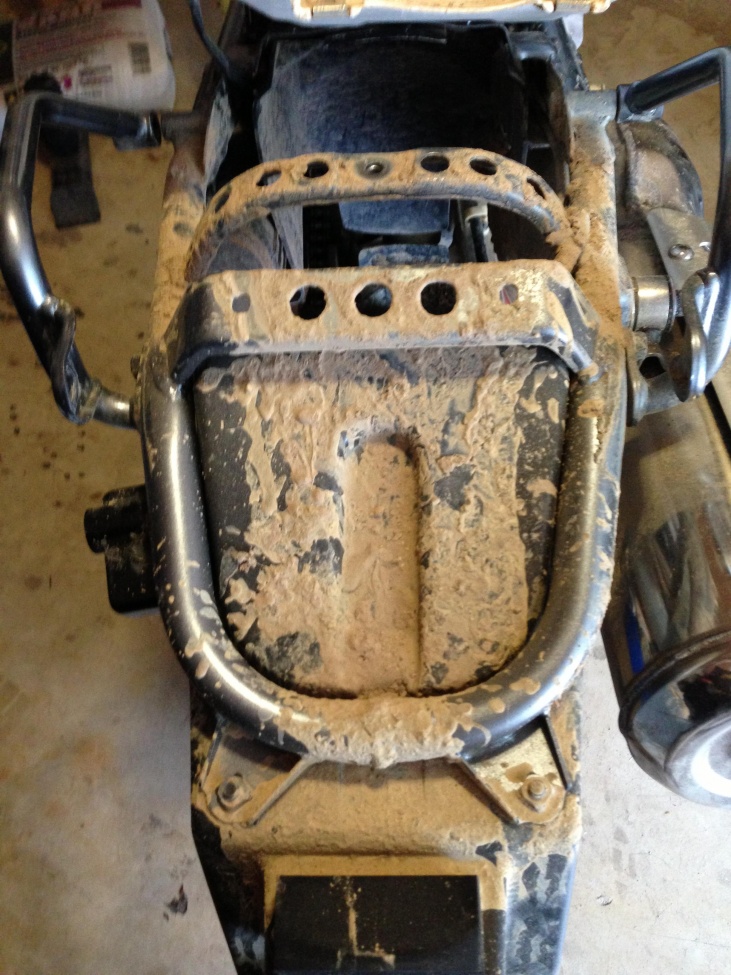
This is what it looks like under the tail section of a DR when you've been riding it properly.
They make it easy to work on, that's for sure. The right side signal wire is on the right side of the bike...the left is on the left.
Installation of the new lights was very easy. I used connectors to make it easier to replace if needed and then encased the wires in a protective wrap of gorilla tape before threading them back forward (very easy to do). I had to "modify" the tail piece a bit and could of down a much better job of it, this was done while on a conference call so it could have been worse The New lights look good and are much more out of the way (and also brighter).
Step one is to basically take off the body work, very easy on the DR.

This is what it looks like under the tail section of a DR when you've been riding it properly.
They make it easy to work on, that's for sure. The right side signal wire is on the right side of the bike...the left is on the left.
Installation of the new lights was very easy. I used connectors to make it easier to replace if needed and then encased the wires in a protective wrap of gorilla tape before threading them back forward (very easy to do). I had to "modify" the tail piece a bit and could of down a much better job of it, this was done while on a conference call so it could have been worse

 The New lights look good and are much more out of the way (and also brighter).
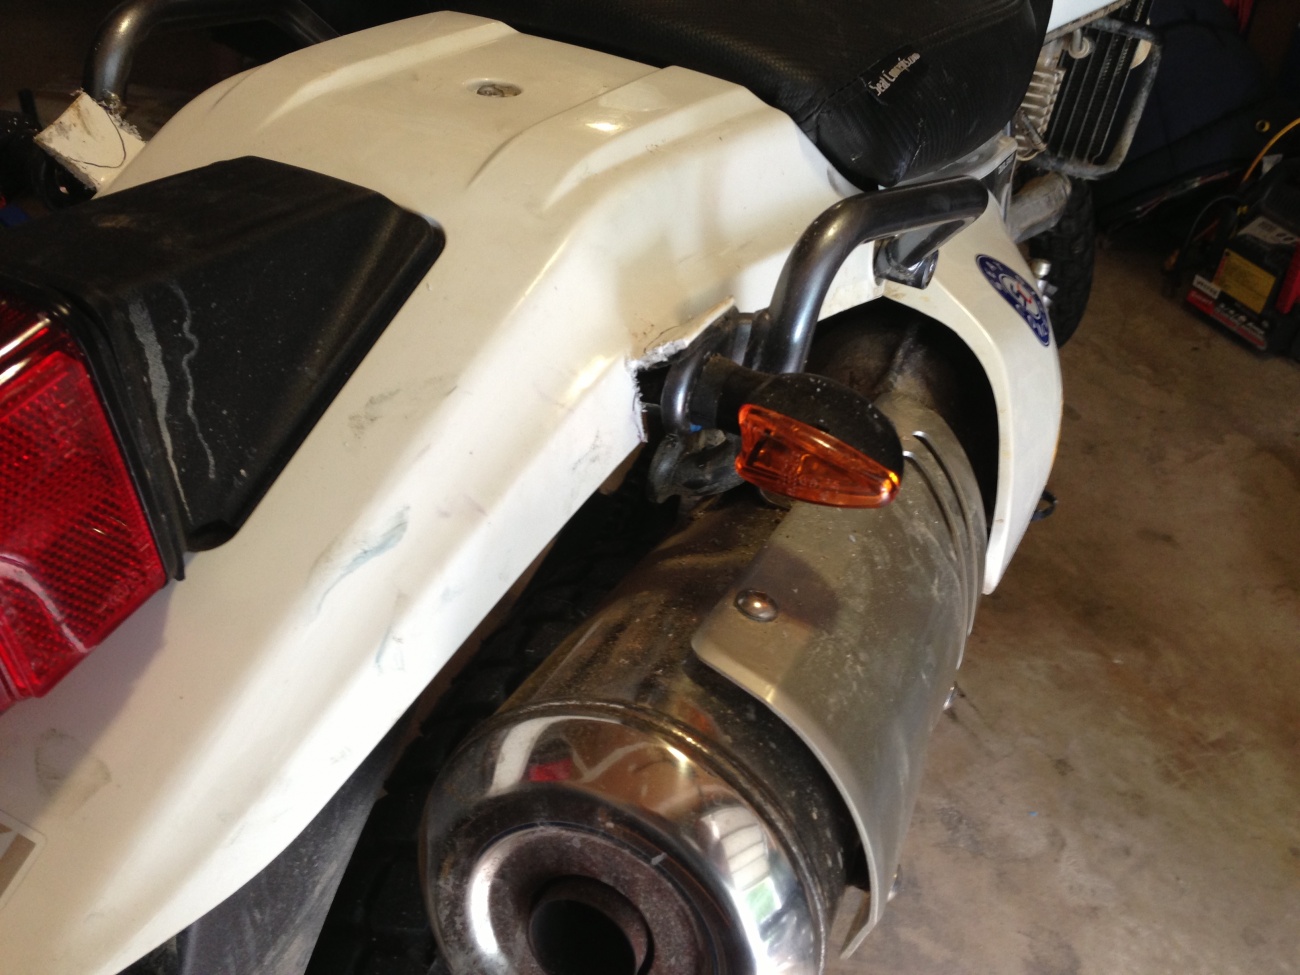

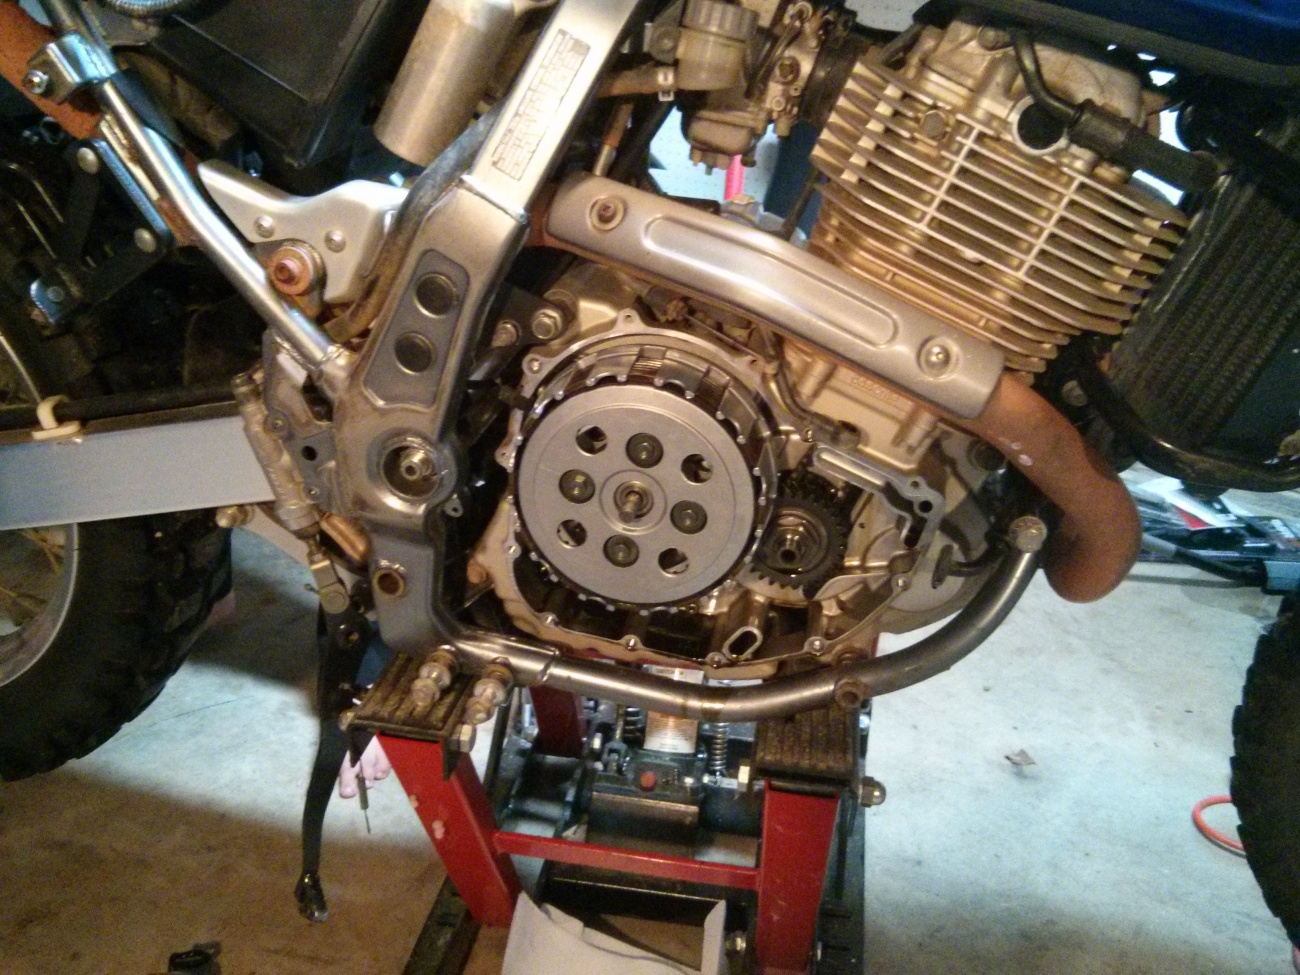
So we tore into  buffalo's DR650SE last night. It has something like 4000 hard miles on the clock.
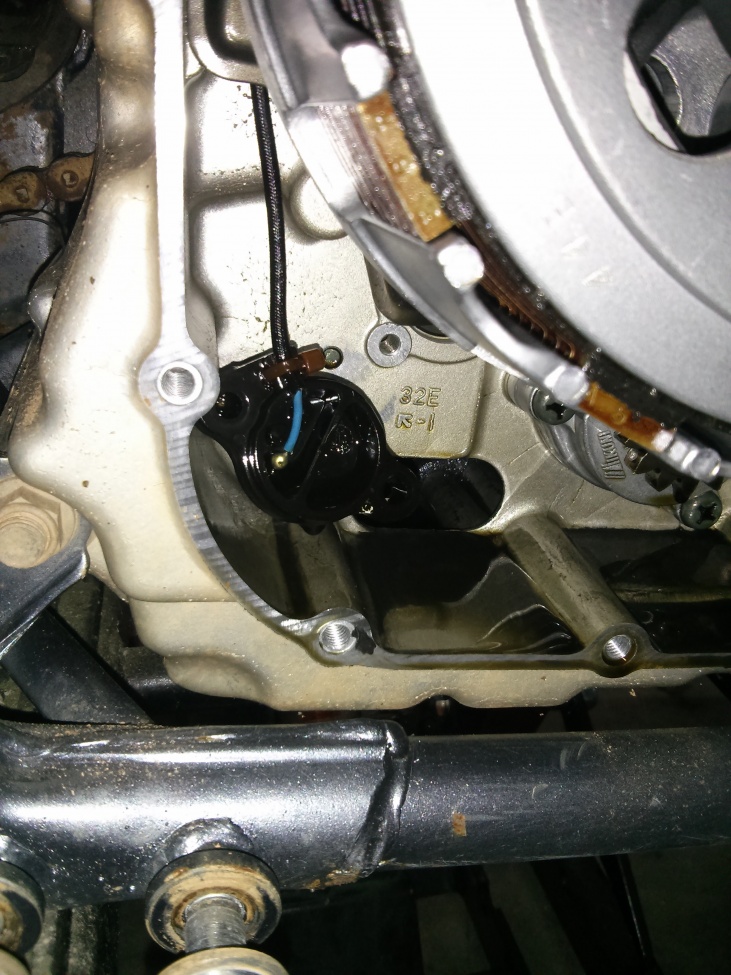
The neutral light wasn't working. We verified the bulb was working and, reluctantly, pulled the clutch cover and clutch basket to reveal that the Neutral Sending Unit (NSU) was hanging there loosely. There was no evidence of the two mounting screws or the pin that goes in it.
So what we don't know is:
1. did the two screws, which are believed to aluminum, along with the pin, which is believed to be steel, drain out with an oil change?
2. did these pieces get mushed to a point that they resemble minute metal shavings (without destroying the motor)?
3. are they all lodged somewhere just waiting to dislodge and ruin someone's day?
What I would love to know is if there's some "typical" place in the engine where these parts tend to go that maybe we could inspect with a scope.
buffalo's DR650SE last night. It has something like 4000 hard miles on the clock.The neutral light wasn't working. We verified the bulb was working and, reluctantly, pulled the clutch cover and clutch basket to reveal that the Neutral Sending Unit (NSU) was hanging there loosely. There was no evidence of the two mounting screws or the pin that goes in it.
Suzuki DR650 - Neutral Sending Unit just dangling
We could not find any evidence of the two mounting screws or the pin that goes into the unit anywhere. There was no visible damage and no metal fragments were visible on the oil drain plug.
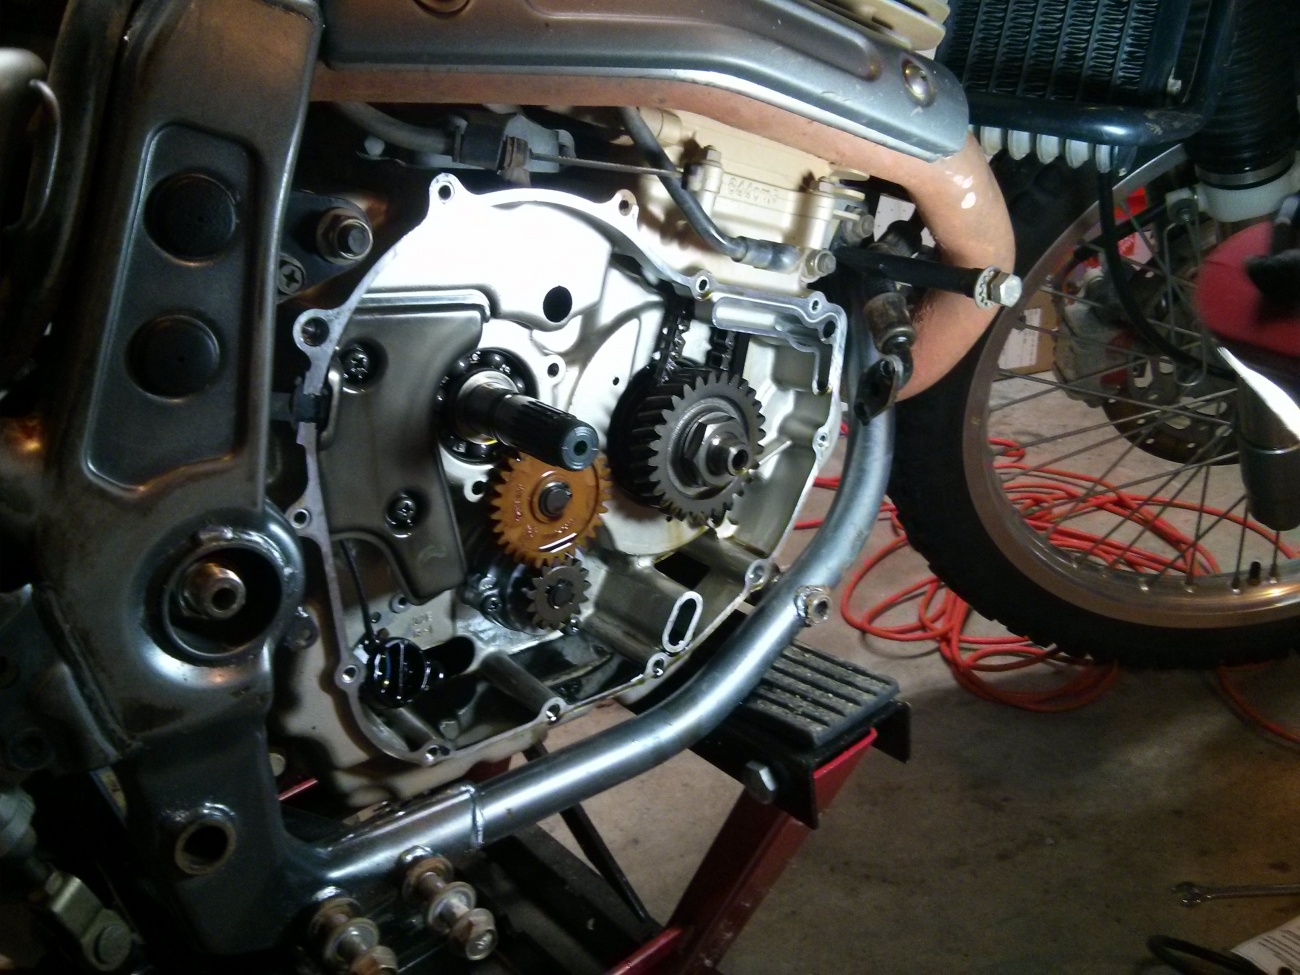
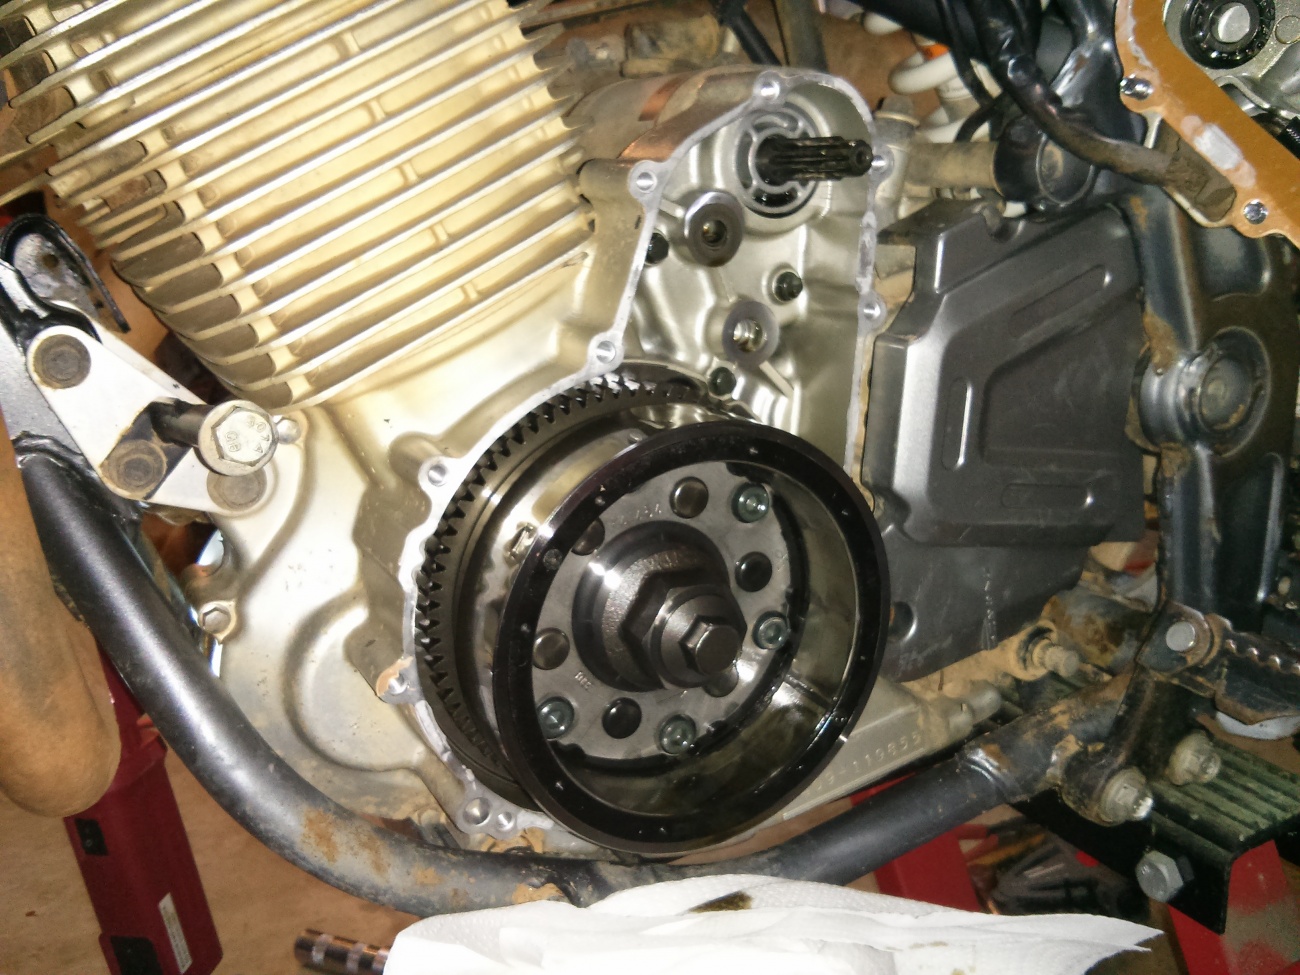
Suzuki DR650 - left side engine cover removed
Our thought was to see if we could see any debris from the other side of the engine.
So what we don't know is:
1. did the two screws, which are believed to aluminum, along with the pin, which is believed to be steel, drain out with an oil change?
2. did these pieces get mushed to a point that they resemble minute metal shavings (without destroying the motor)?
3. are they all lodged somewhere just waiting to dislodge and ruin someone's day?
What I would love to know is if there's some "typical" place in the engine where these parts tend to go that maybe we could inspect with a scope.
My guess is that they're gone. Unless the diabolical little screws are lurking in wait somewhere in the engine... Doesn't seem likely. I'd probably put it back together and ride it.
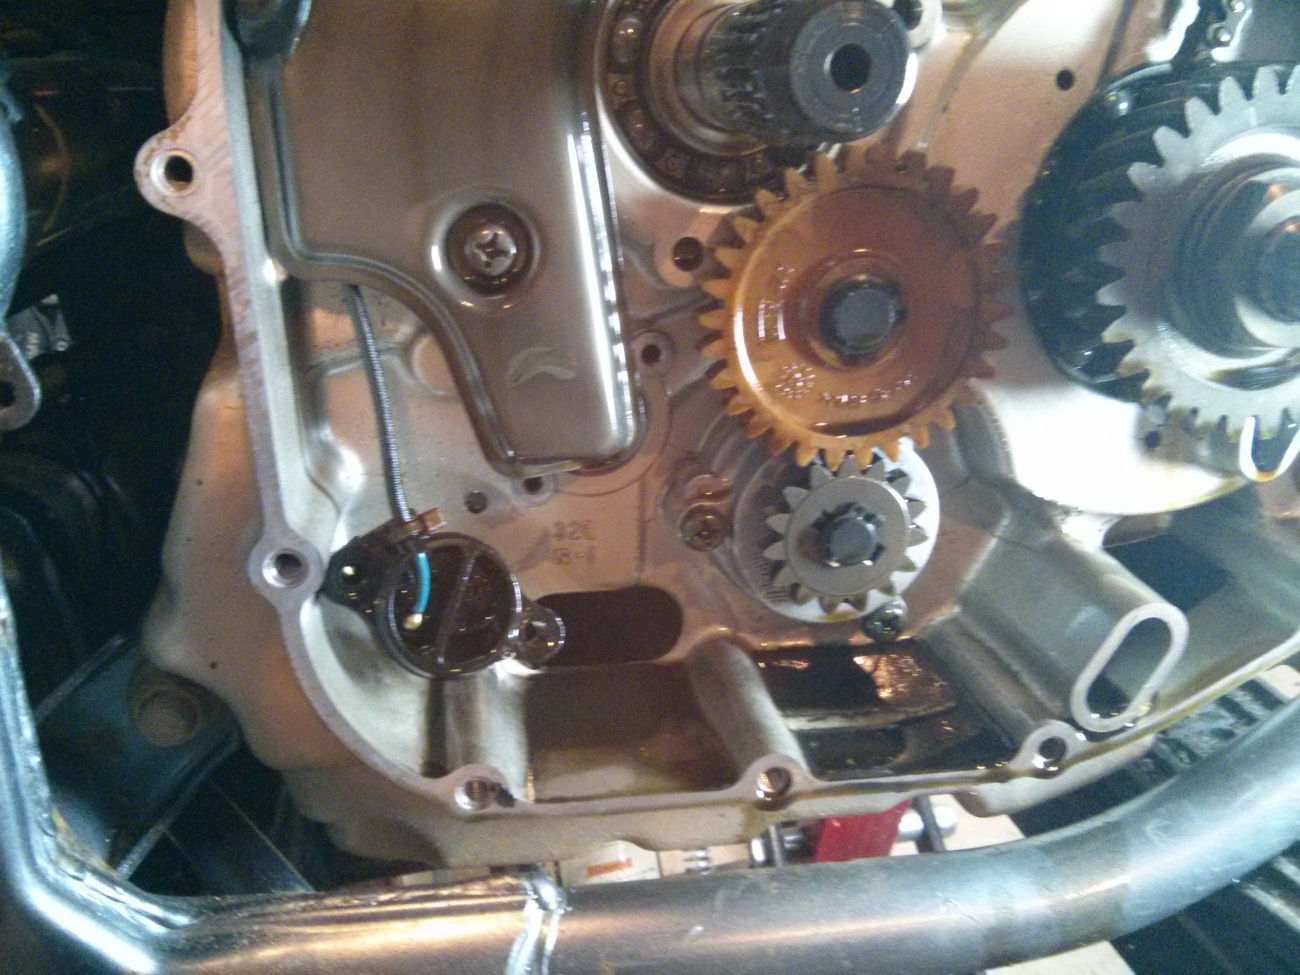
We checked the oil and the filter for any trace of the missing screws, pin and spring, and passed a magnet through the sump of the motor, but nothing turned up. I think we may run Yermo's bore scope in there to look for damage to the transmission or the crankshaft and connecting rod.
If we don't find any damage or any of the parts, we might just put it back together. The one catch is, the parts are all on backorder with Suzuki. In other words, unless a dealer has them in physical stock, Suzuki doesn't have them in any of their warehouses. Coleman Power Sports told me the the only way to find out when they'll be available would be to place an order. But: the spring and the "pawl roller" or "contact" have been used in many Suzuki bikes over the years and seem to be available on Ebay, and the screw dimensions are known, so they can be replaced with socket cap screws with can then be lock tighted, drilled and safety wired. So we'll see what if anything the bore scope tells us.
Here's a link to an article on the proper fix for loose neutral safety switches:
ADVrider - View Single Post - the DR650 thread
BMW GS Adventure motorcycling message forums
http://www.advrider.com/forums/show...
I would get the pawl roller and spring from ebay and then get the safety wire ready bolts and some safety wire.
buffalo, from you email. I figured we'd document the part numbers/info here so we have something to refer back to if we need.The Suzuki part numbers are:
"pawl roller" or "contact": 09209-05011
"spring": 09440-04010
"screw" (2 reqd): 02112-0516A (old number: 02112-05163)
According to an article I found on ADVrider, the stock screw is:
5mm x 15mm x .8 pitch phillips head screws, but some people are replacing them with 5mm x 20mm x .8 allen head bolts with two 5 mm washers under them so the screw heads can be drilled and safety wired:
ADVrider - View Single Post - the DR650 thread
BMW GS Adventure motorcycling message forums
http://www.advrider.com/forums/show...
buffalo, one thing we did not try was laying the bike on it's left side to see if maybe screws in the sump would fall out to become visible. This was suggested on the Facebook dr thread. I can come over with the bore scope again if you want to try that experiment. Over on facebook, one guy who is in the same boat we are in is going to split his case looking for the screws.It would be an interesting experiment, though gas might dump out everywhere. Not sure how well the tank seals. We'd also have to at least loosely reconnect the alternator cover, or remove it completely.
Meanwhile, the pawl roller/pin and the spring have been purchased on Ebay. They are both due to arrive NLT Friday the 26th.
Removing the gas tank on that bike is really easy. I would definitely remove it before trying to lay the thing down on it's side.
So, much progress has been made since. We took the gas tank off, shook the bike, put a magnetic drain plug in, and found the neutral light contact spring sitting on the magnet. After that the NSU was replaced with new socket cap screws, and loctite red, so it should never work its way loose again. The clutch looked a touch burned but serviceable, so gaskets were replaced, and the engine was bolted back together. Forks are out being rebuilt, and tires should arrive in the next day or so. This bike is in serious danger of being rideable here soon
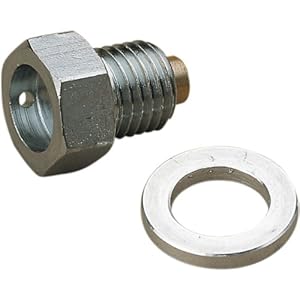
These magnetic drain plugs for the DR have proven their worth:
This fits 93-94 (I'm looking for a good link to one that fits 96-later)
There's one available on:
DR650 NSU spring
To our dismay, the Neutral Sending Unit screws, plunger, and spring had fallen out on Duncan's DR650. We pulled the side covers off and used a void scope best we could to inspect the engine for damage and any sign of the missing pieces. Several attempts yielded nothing. Duncan suggested maybe screwing in the powerful magnetic drain plug he had gotten. Upon screwing it in I heard a click and pulled it back out. This is what we found.
This fits 93-94 (I'm looking for a good link to one that fits 96-later)
Amazon.com: MOOSE MAGNETIC Drain Plug: SUZUKI DR 650 DR650 93-94: Automotive
Amazon.com: MOOSE MAGNETIC Drain Plug: SUZUKI DR 650 DR650 93-94: Automotive
http://www.amazon.com/MOOSE-MAGNETI...
(affiliate link)
There's one available on: