


Scheduling a Ride
To schedule a ride log in and then select the three lined menu button in the upper left corner of the page. This will reveal a drop down menu.
Select Rides to expand the menu.
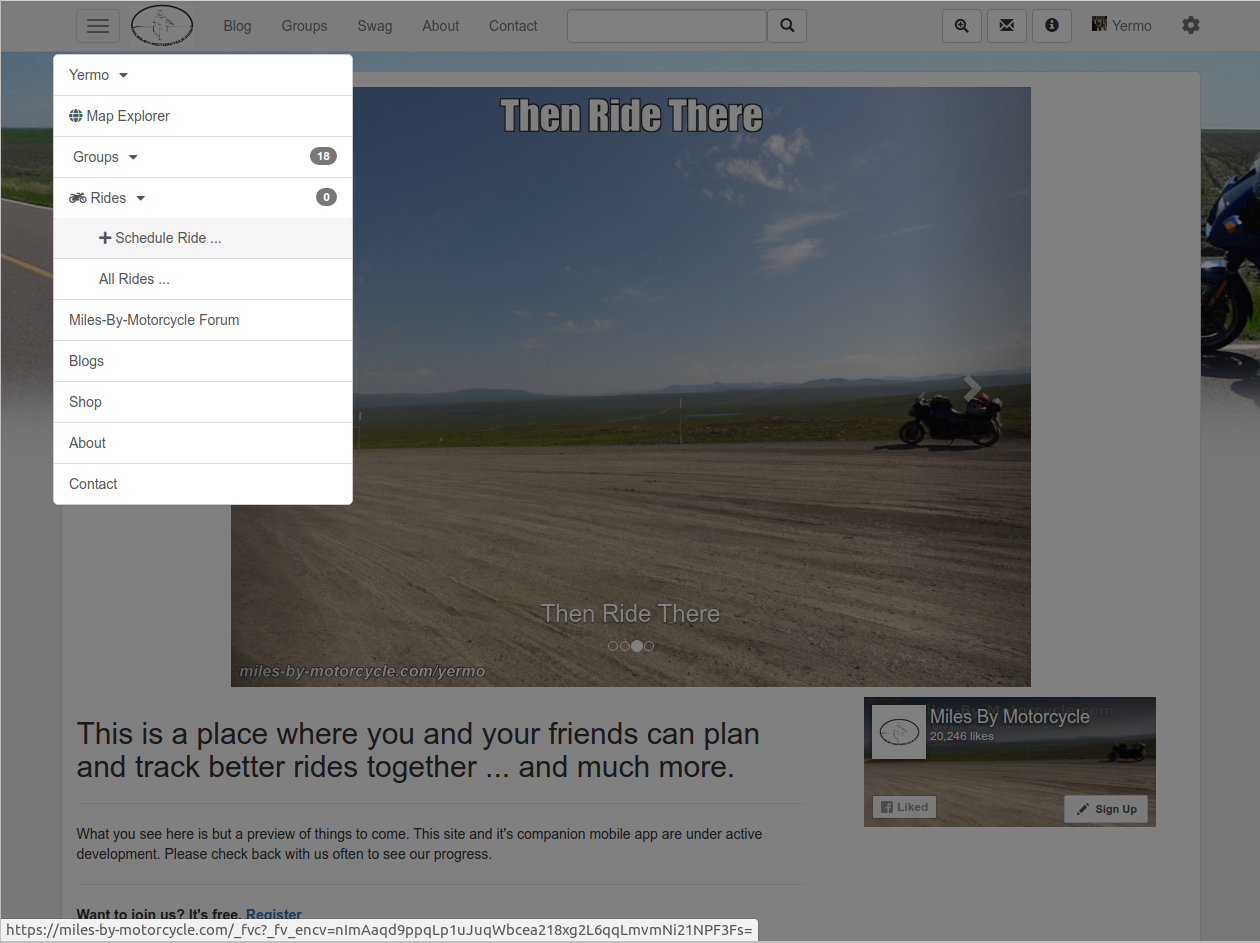
Then select + Schedule Ride to bring up the schedule ride form.
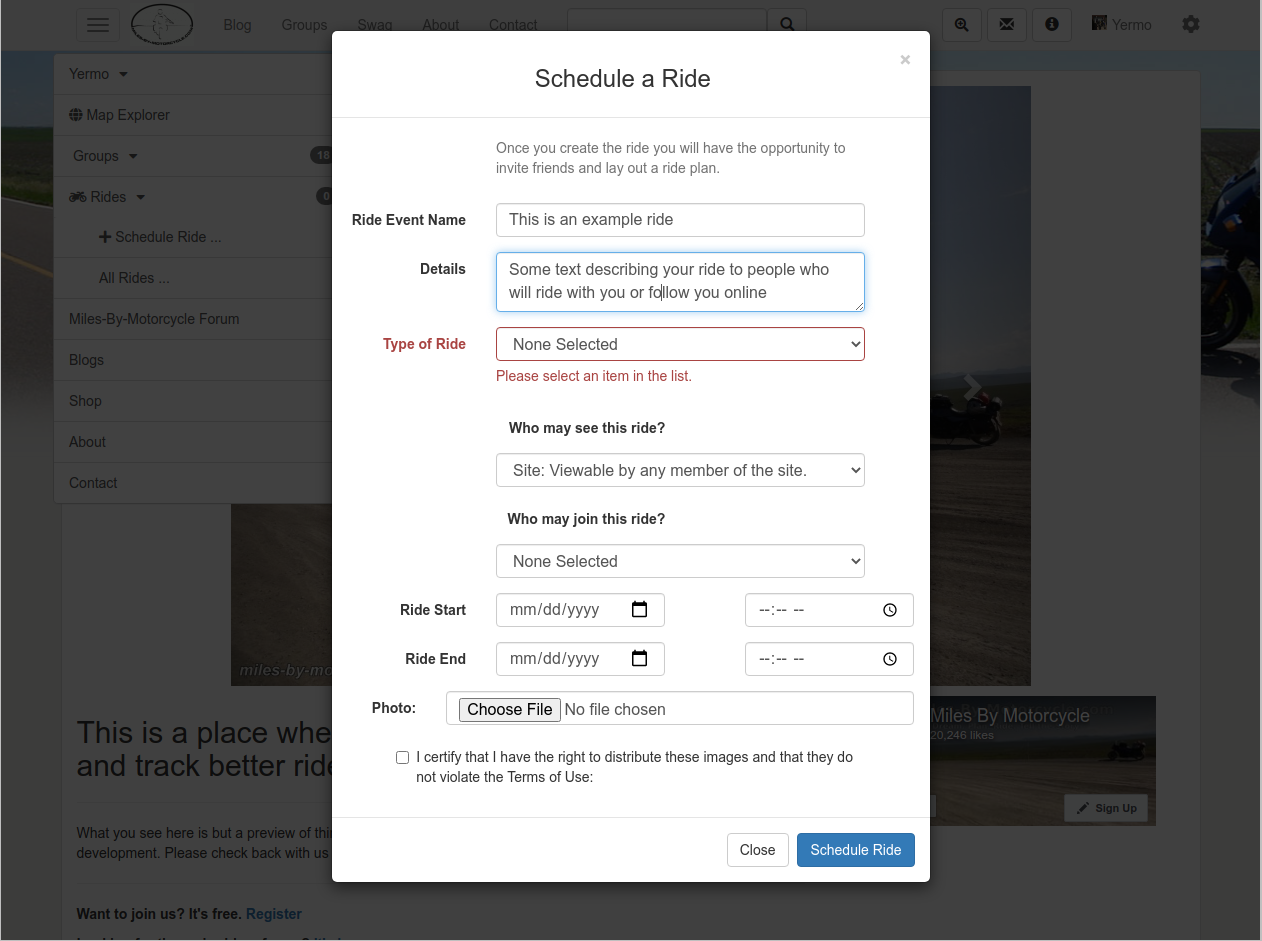
Enter a title and description for your ride. Consider what riders who will be joining you will want to know in addition to those who might be following along from home.
There are currently two types of rides that can be selected:
- Street - a ride that will be strictly on pavement
- Adventure/off-pavement - a ride that includes unpaved sections.
Eventually I'll add other types to the list.
Decide who you would like to be able to see the details of this ride. By default any member logged into the site may be able to see the ride. The available options are:
- Site : Viewable By Any Member on the Site - any logged in member may be able to see the site.
- Invited : Only Invited Members May see the Ride - this limits who can see the ride to member you have specifically invited.
- Public : Viewable By the World - this allows anyone to see the ride. Use this option if you would like to share the ride to other sites such as Twitter or Facebook.
- Private : Only You May See the Ride - this options makes the ride private and only visible by you.
Again, if you want to share you ride out to other sites, it needs to be set to public.
Decide who you would like to allow to join this ride. Either anyone may join or watch, or only people you specifically invite.
- Open Ride : Anyone May Join - choose this option if you want anyone to be able to follow along or possibly join you on your ride.
- Invitation Only : Only People You Invite - choose this option to control who may watch or join the ride.
Note that who may join is different from who may view the ride. You might have an invitation only ride for you and a buddy but want anyone to be able to see it.
Select a start date and time and end date and time for your ride.
And as a final step to scheduling the ride, I suggest adding a cover photo to your ride. It makes for a more appealing presentation especially when sharing out to social media sites as this photo will be used as the cover photo when shared.
Select Schedule Ride which will drop you on the About page of the ride.
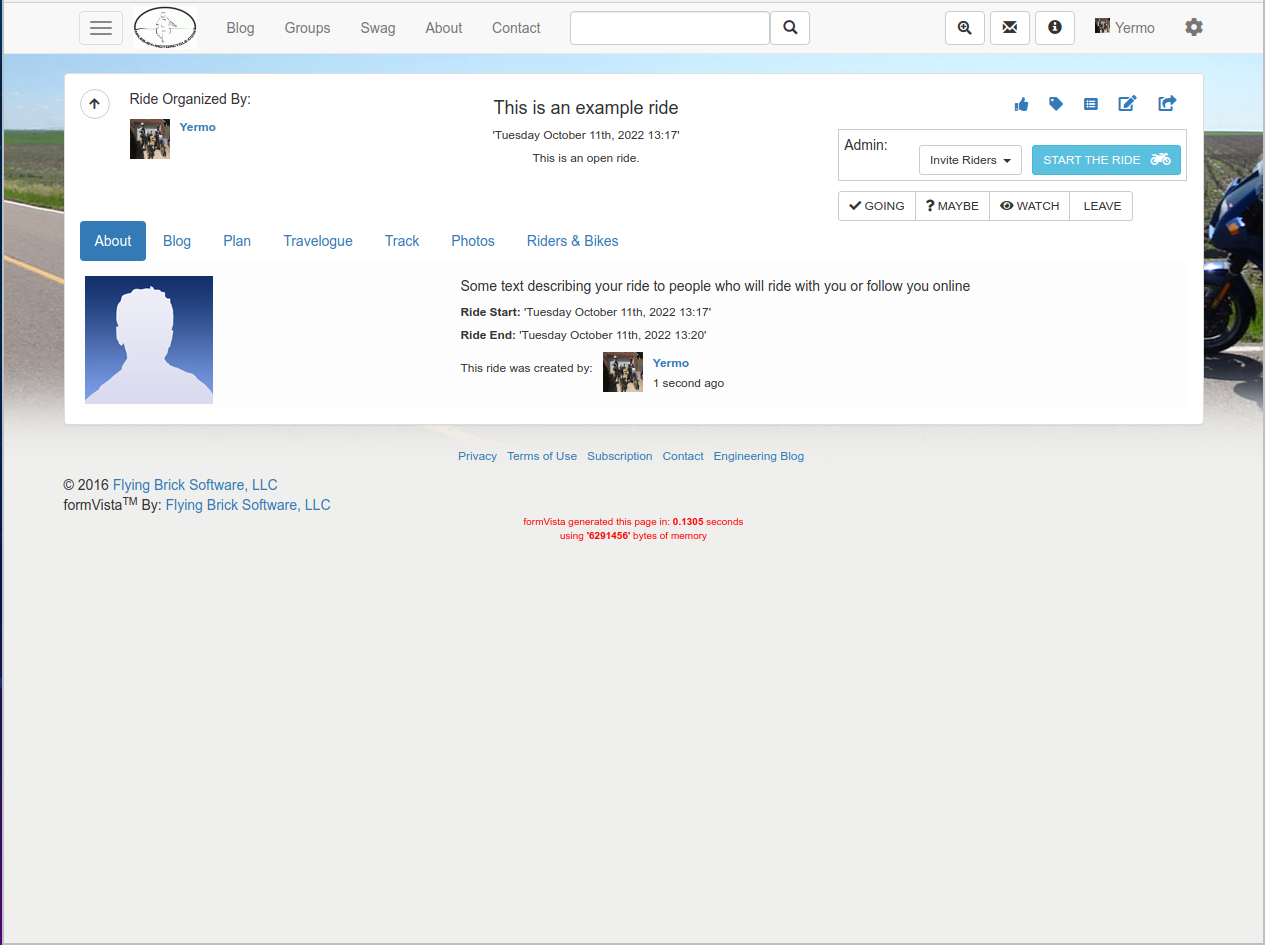
If you want to change any of the settings of your ride later, you can edit it by selecting the edit icon which is in the upper right corner. It's the one that looks like a pen writing in a box.
Inviting Riders
If you would like to invite people on your ride you can select the Invite Riders drop-down in the admin box in the upper right.
There are two options.
Riders who have accounts on the site can be invited using their user name.

On this form, enter the first few letters of the user name and then select it from the list. You may select multiple users to invite them in batch. Once you have added everyone you'd like to invite, click the Add Members button and they will be sent a notification telling them about the invitation.
If they do not yet have an account on the site you can invite them using their email address.
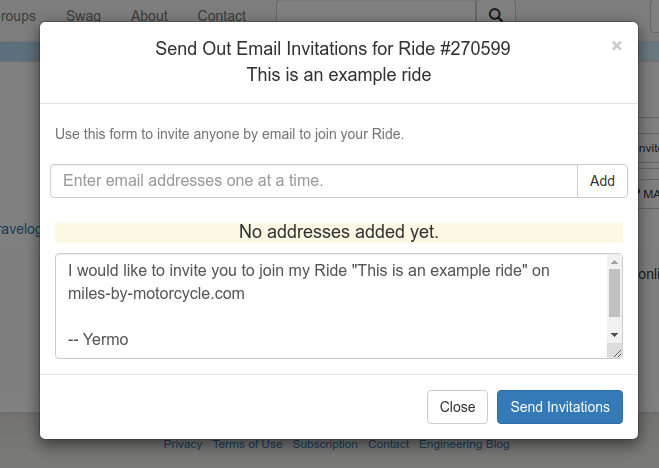
Enter the email address of the person you'd like to invite and select the Add button to add them to the list. Once you've entered everyone you'd like to invite, select the Send Invitations button and an email will be sent inviting them to join the site and your ride.
When a user gets an invitation, they may respond with one of four options using the buttons in the upper right.
NOTE: If you are an app alpha-tester do you use these buttons to set your status. Do it from the app instead.
-
Going - the user intends to physically join you on your ride. They will be asked to select what bike they will be taking.
NOTE: On the site, this is currently awkward as the user has to add a bike to their list of bikes first, before joining the ride. This is on the list of things to fix.
- Maybe - the user may attend in person but is not sure.
- Watch - the user will just "watch" the ride and get notifications from time to time when you post updates.
- Leave - the user is not interested and will be removed from the ride.
Tabs
Everything related to the ride is grouped into tabs across the top.
- About - this tab contains the description of the ride you entered when creating the ride.
- Blog - This is a space for writing longer articles about your ride. I use this on my bigger solo rides.
- Plan - This tab contains your planning map where you can store a route to follow, points of interest to see, alternate roads to explore, notes, videos, etc. On that tab click the Interactive Map button to view the map. To edit the planning map, select the three dots icon in the upper right of the map image and select Edit. Using the left menu on the map, you can upload a GPX track if you have already planned out the ride. (NOTE: An article about working with maps is forthcoming.)
- Travelogue - This tab resembles a Facebook event feed. It contains posts and photos in reverse chronological order of everyone on the ride. Especially when combined with the offline app, this is a great way of remembering events, people, places, good roads, or other notable events you might like to share with people when you're back at the bar. For example, on my most recent trip, I heard a sonic boom for the first time, so I noted it in a post. Posts appear on the map.
- Track - When running the app, this will contain a track of the path you took on your ride. It will also contain markers for any posts or photos you added. To edit the Track map, select the three dots icon in the upper right and select Edit. From there, you can also upload a GPX track from your GPS if you are not running the app.
- Photos - A view of just the photos added to the ride.
- Riders & Bikes - This is a list of everyone who has been invited, is going, or is watching the ride.
If you have signal, you can add posts and photos from the travelogue tab. Just select that tab and + Post an Update.
If you are in the Alpha Program, you can do this from the app while out of cell service.
Starting Your Ride
Once you are ready to depart on your ride, you can select the Start Ride button in the admin box. This will notify all the riders and watchers that the ride is now underway. This will also cause this ride to appear in the Underway tab.
Sharing
The share button on the ride is broken. If your ride is public, the best way to share it is to just copy the URL from your browser and past into Facebook or Twitter.
Finding Your Ride Again
To get back to this page you can get to it from the three line menu button followed by Rides then All Rides. There are four sub tabs on the Rides tab of your account.
- Underway - rides that are currently active.
- Featured - rides that have been tagged as featured.
- Upcoming - rides that have not yet started.
- Past - past rides.
You can also search for your ride using the Advanced Search screen along the top menu. It's the magnifying glass with a plus in it. Select it to raise the advanced search form.
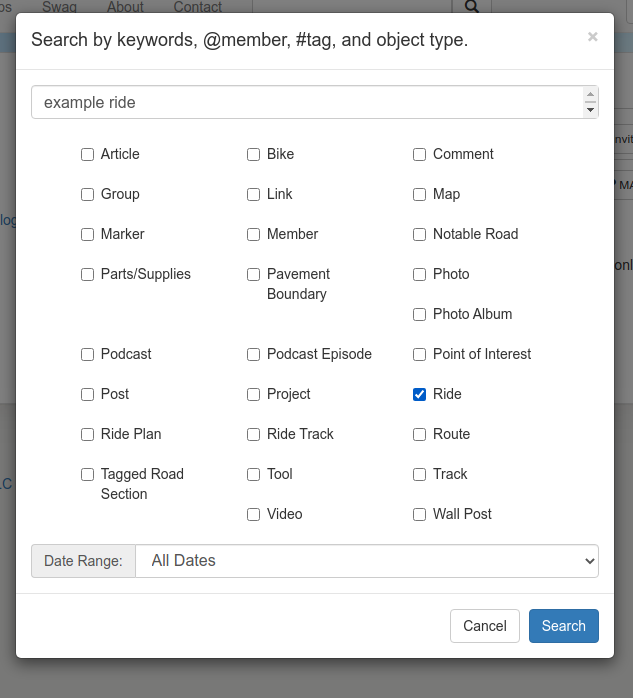
Enter some keywords from your ride and check the Ride checkbox and click search.
You may get multiple search results.
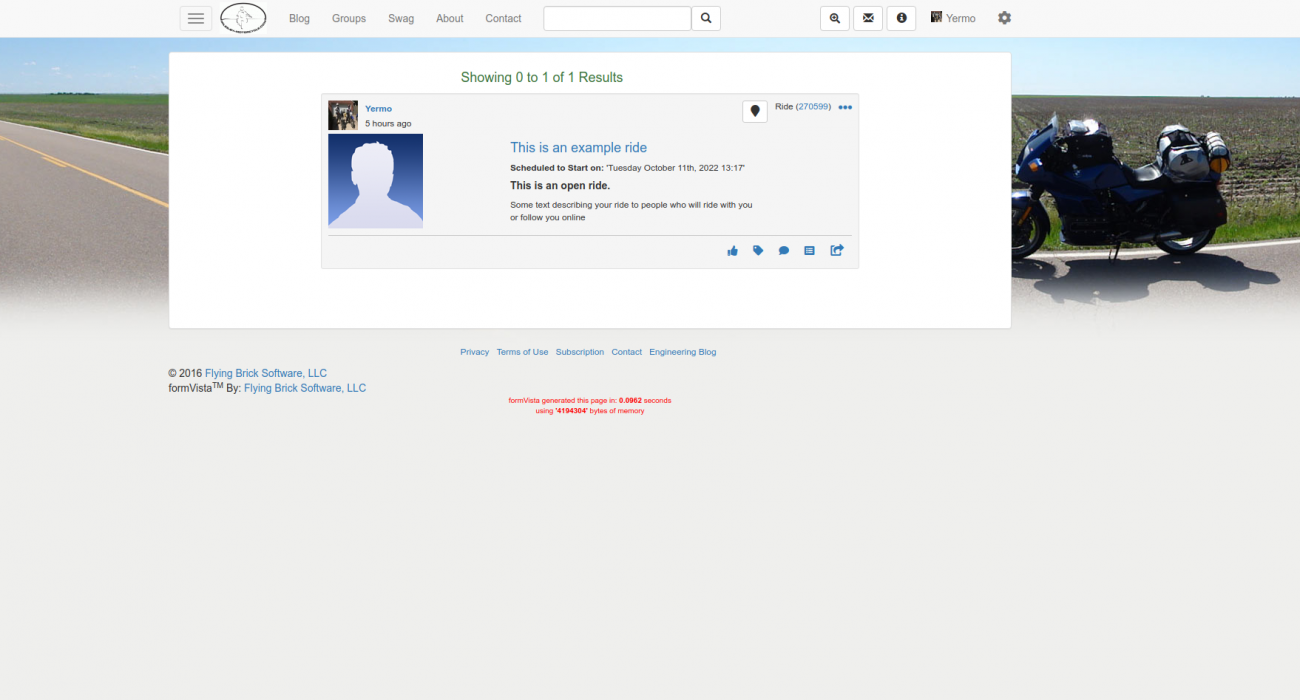
Select the title or the ride number to view the ride.
It is also a good idea to jot down the ride number. You can just enter the number of any ride in the top search bar to immediately jump back to your ride.
Tags
- 1 help
- 1 geolocation
- 1 photos
You must be a member of this group to post comments.
Please see the top of the page to join.