
Zumo 550 Button Repair blog
Blog For Zumo 550 Button Repair
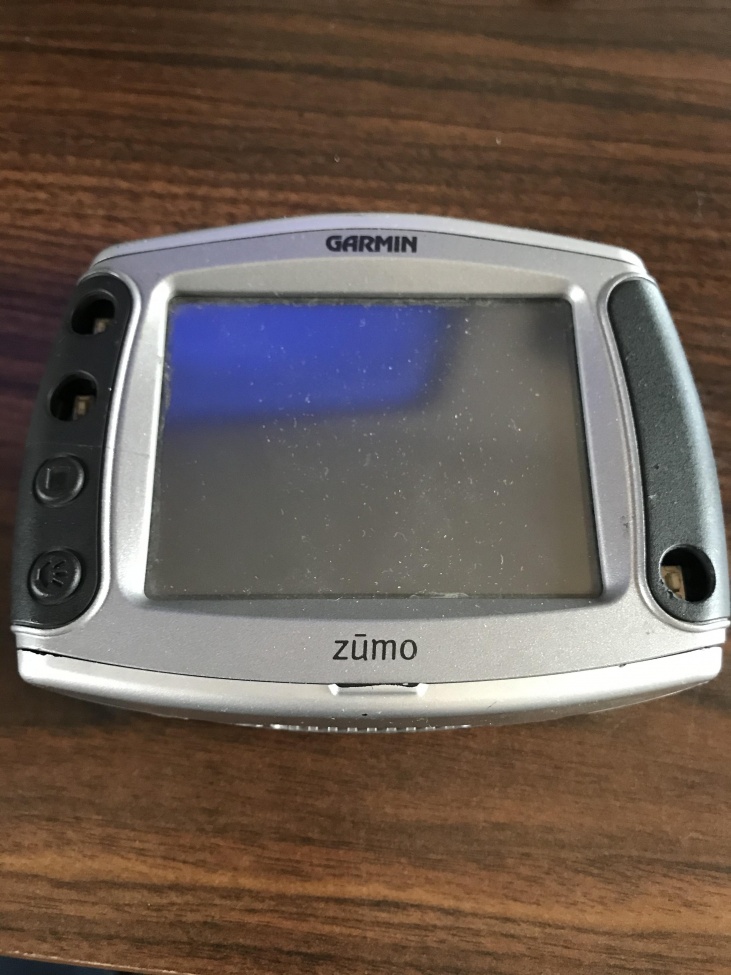
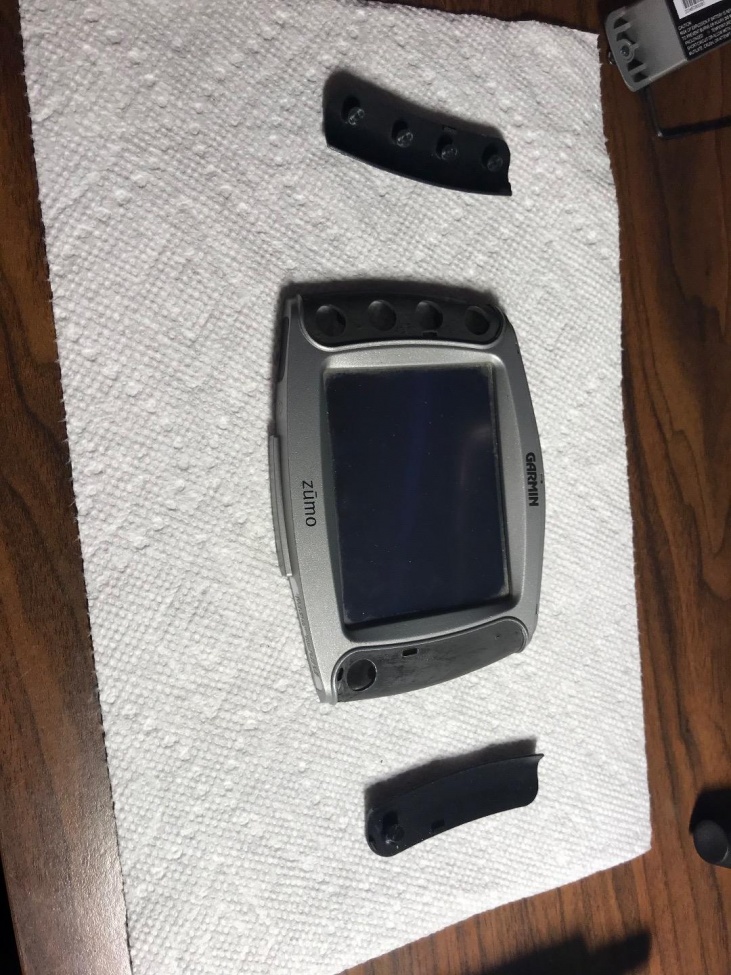
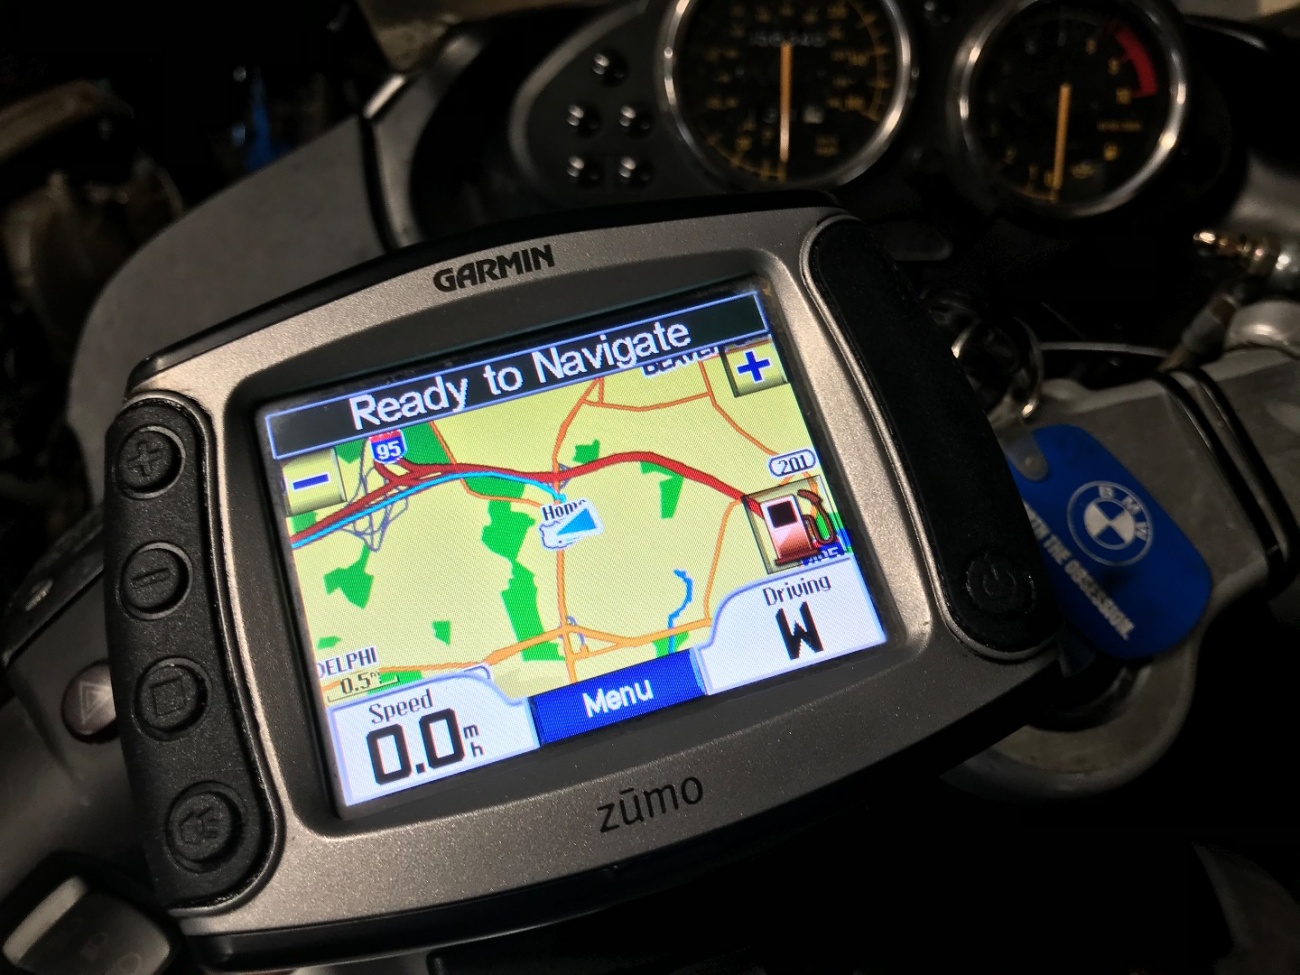
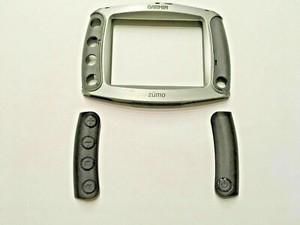
The rubber keypad buttons on Garmin Zumo 550 model tend to fall out after some time.
Initially, I looked up whether they could be repaired. In a thread over at ADV Rider, I came across a source for replacement buttons.
Garmin Zumo-400-500-550 replacement rubber keypads. | Adventure Rider
For sale "New Garmin Zumo 400 - 500 - 550 replacement keypads ". [ATTACH] [ATTACH] [ATTACH] [ATTACH] After a while the Garmin Zumo 400 , 500 , 550...
https://advrider.com/f/threads/garm...
I ordered them but a deal on a second unit in good shape came up so running out of time I got the second unit.
Last season the buttons on that unit also started falling out. I rely on these devices pretty heavily as I use them not only for navigation but also for testing the motorcycle mapping app I've been developing for ages.
Last night, in a moment of rare motivation, I decided to see if I could replace the buttons.
At first it seemed a bit intimidating as jobs like this often do. I found a disassembly video that helped clear things up:
Please note, as luck would have it, I found the manufacturers instructions after I finished this job and there are some differences between what I did here and what the manufacturer suggests.
The differences between what I've done and what the manufacturer suggests are:
- remove the screen from the front casing
- instead of scraping the old keypads off, use a heat gun to remove the existing keypad but don't heat it up too much otherwise it will deform the casing.
- use acetone and a brillo pad to thoroughly clean the surface.
- add some silicone sealant behind the buttons.
The result I achieved looks pretty good but time will tell if it's durable. The next one I do I will clean with acetone but I don't think I feel comfortable using a heat gun on this plastic. I may go back into the one I just finished and add some sealant around the inside of the buttons. Thinking about it now it seems like it would add some strength to the buttons and might make them last longer.
So here follows what I did.
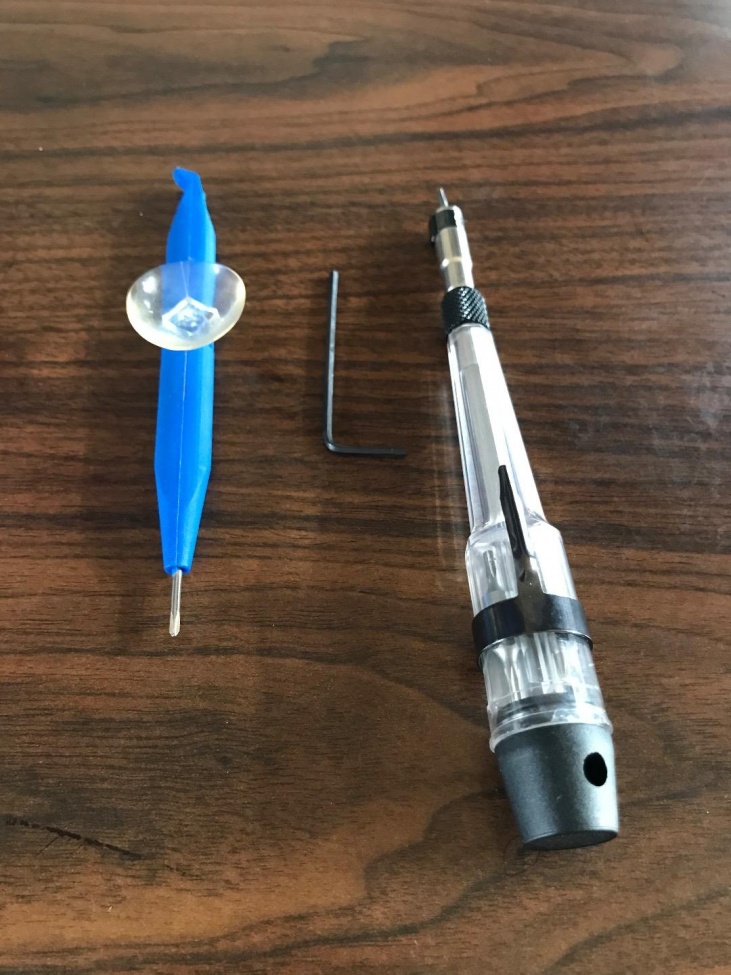
The tools I used to do this are:
- a small plastic pry bar like you would find in a phone repair kit
- a 2mm allen key for the battery compartment
- a T6 torx bit, preferably a long one as the screws are pretty deeply recessed.
- a small pick (not pictured)
- nitrile or latex gloves
- paper towels
You will also need some silicone sealant used to glue the new pads onto the unit.
I would recommend charging your Zumo before attempting this. When you put it together you'll want to test it before complete reassembly. I failed to do this so had to wait to charge the thing before I could button it up.
Once charged, remove the battery using the 2mm allen key.
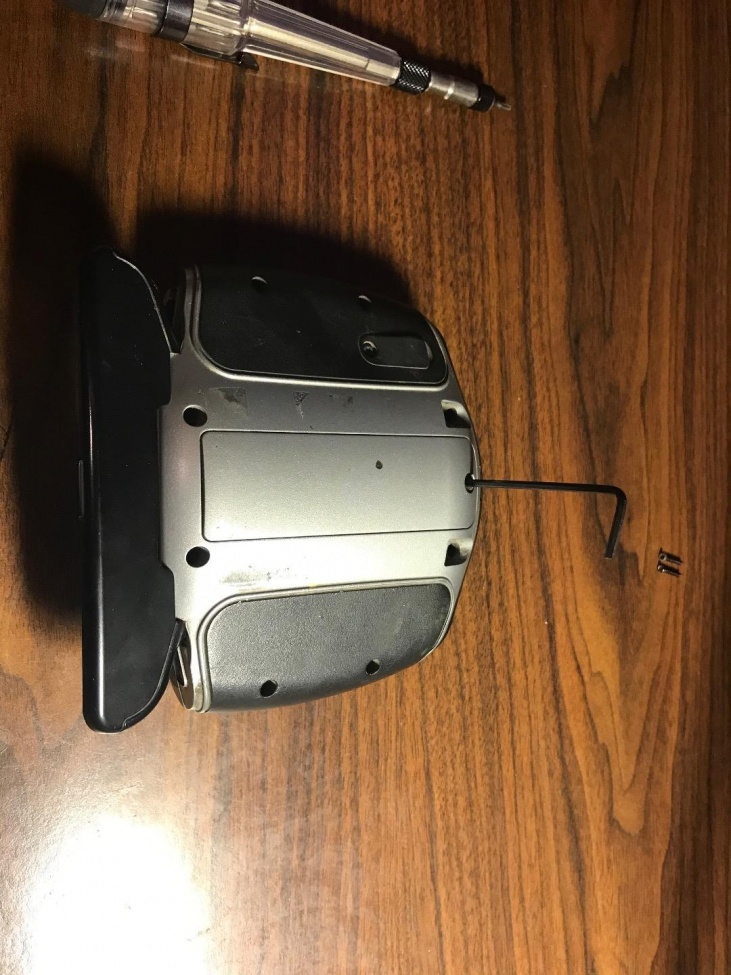
There are 8 torx screws on the back of the unit. Some of these are pretty deeply recessed. Since I only had the small bit I had to improvise turning the thing.
Once the 8 screws are out, use the pry bar to remove the top black cover at the pry point.
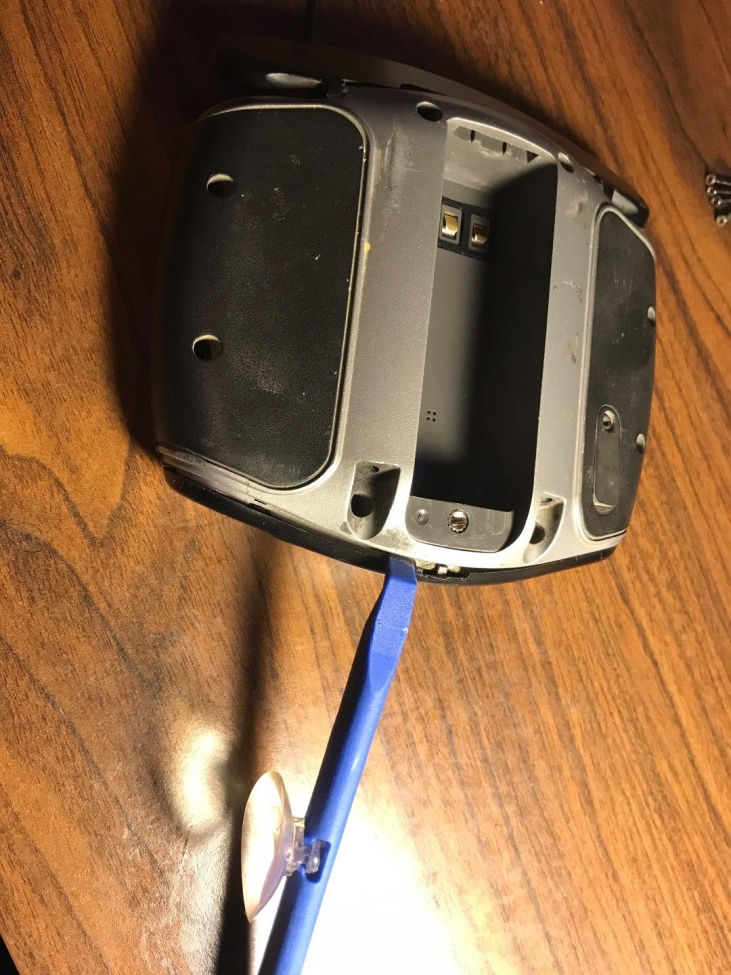
It just pops off.

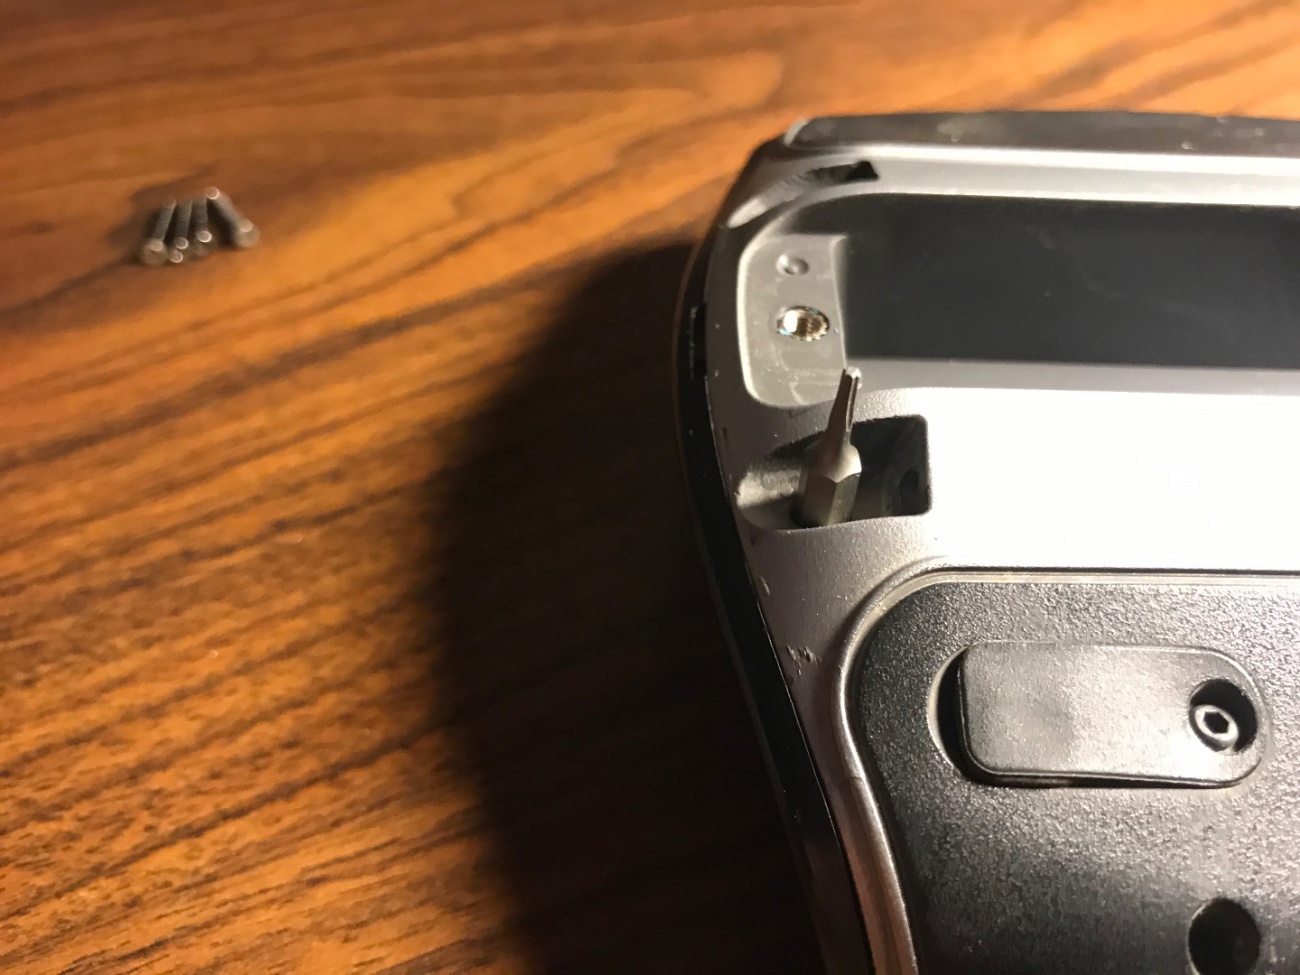
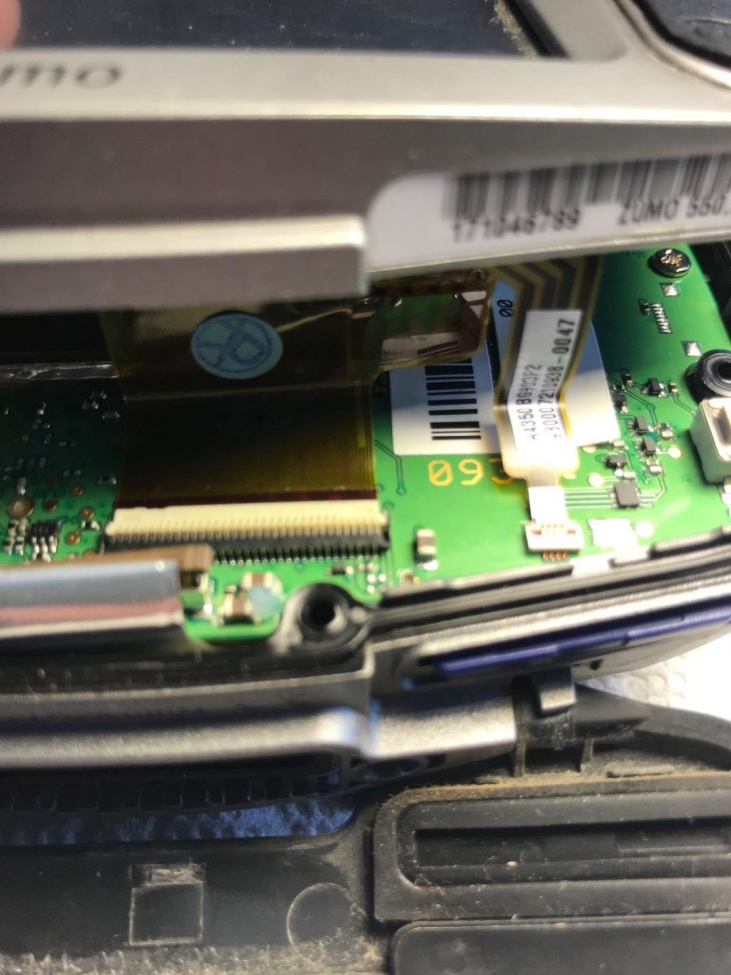
The two halves come apart pretty easily. There are two super small and fragile ribbon cables connecting the screen part to the rest. I tugged on these and they came out but what I failed to realize is there are little clamps securing the wires to the connectors. You can just flip up the clamp to release the wires.
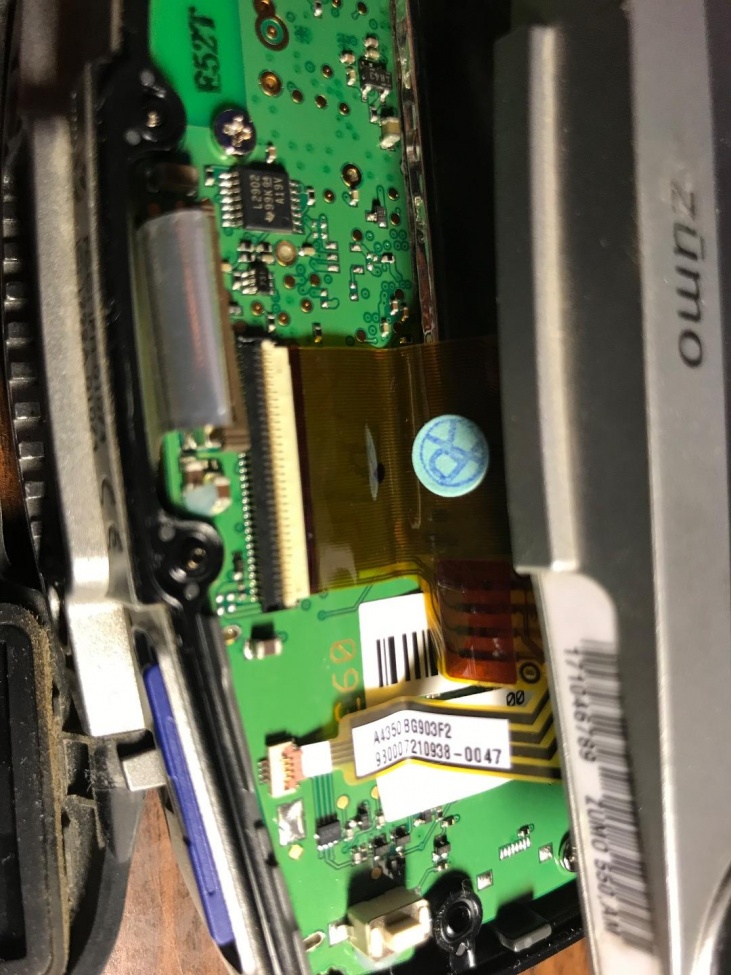
Once you disconnect the wires, put the bottom half aside.
What was initially unclear to me was that the existing button bar is glued onto the unit. I used the pry bar and the pick to gently peel the existing pad off the unit.

It's not immediately visible but there are three holes that the tabs from the keypad fit into. These have to be cleaned out thoroughly. The pads are impressively accurately made and if they don't seat neatly it means most likely that there's some remaining sealant in the holes.
I took quite some time cleaning these out as best I could. There are two tab holes on the power button side and one on the other side.
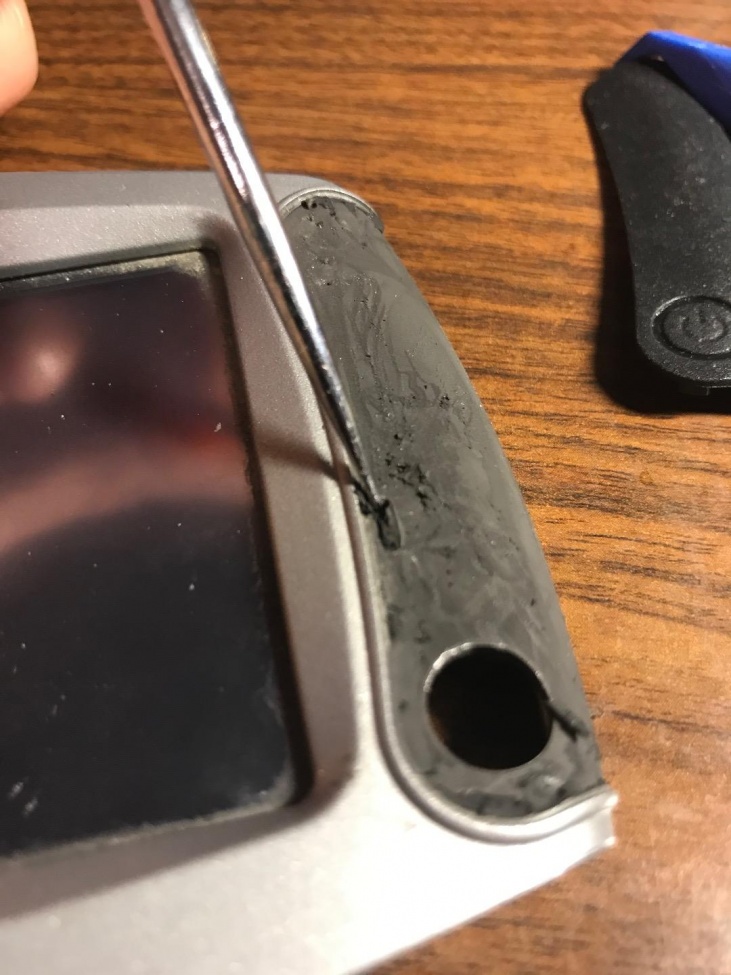

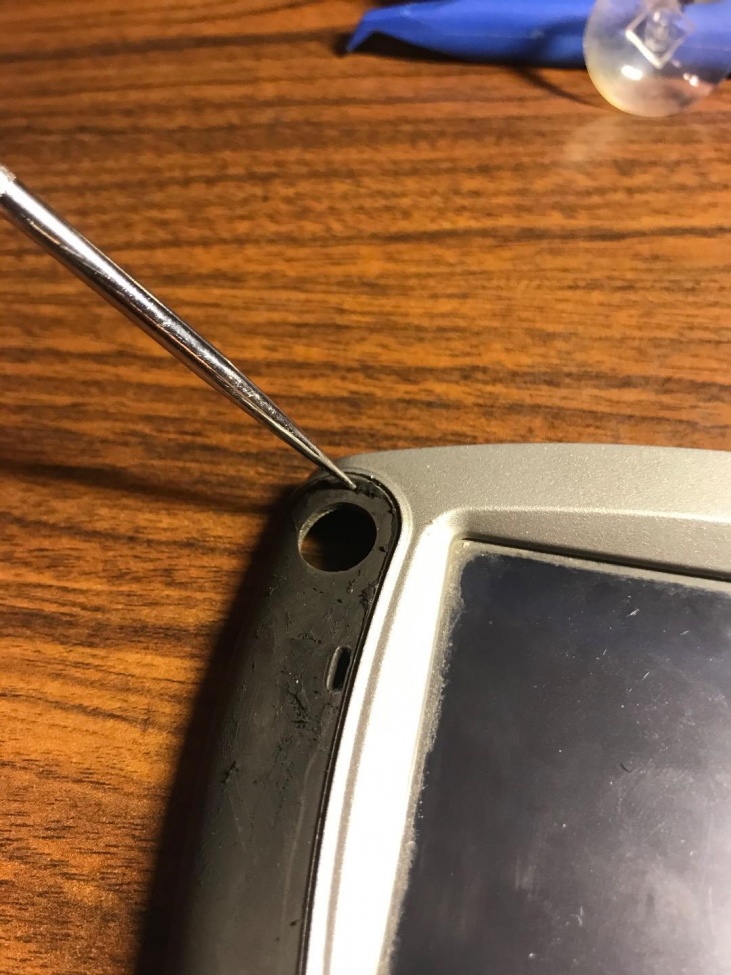
Using the pick I scraped off as much of the sealant as I could get off without damaging the underlying surface.

I figured gluing it would be error prone and messy so I made sure to test fit the pads before attempting to glue them. That's when I figured out the holes have to be cleaned very thoroughly.
I had some black silicone liquid gasket maker lying around so decided to give that a try. No matter how careful I am it seems like sealant and I don't get along and it gets everywhere.
This time, however, I was prepared. Three pairs of nitrile gloves and a bunch of paper towels.
I squeezed some sealant out onto a paper towel and then using my index finger took a small amount and spread it evenly over the surface where the pad goes.
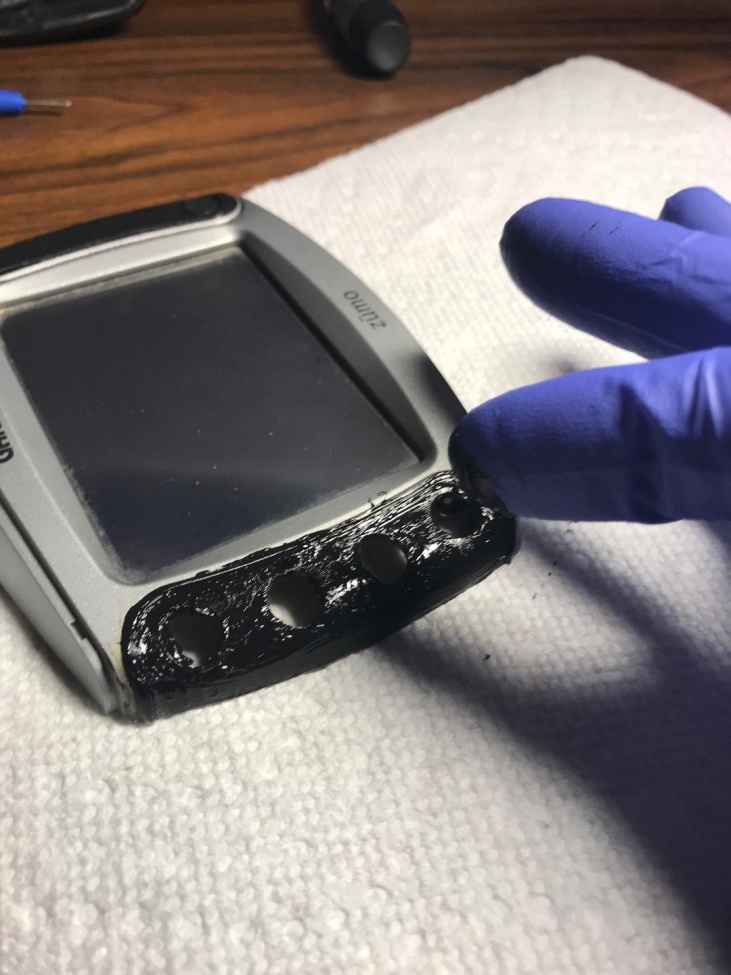
I placed the pad carefully pushing the tabs into place.
Of course sealant spooged out and got over everything but cleaning it up with a paper towel worked well.
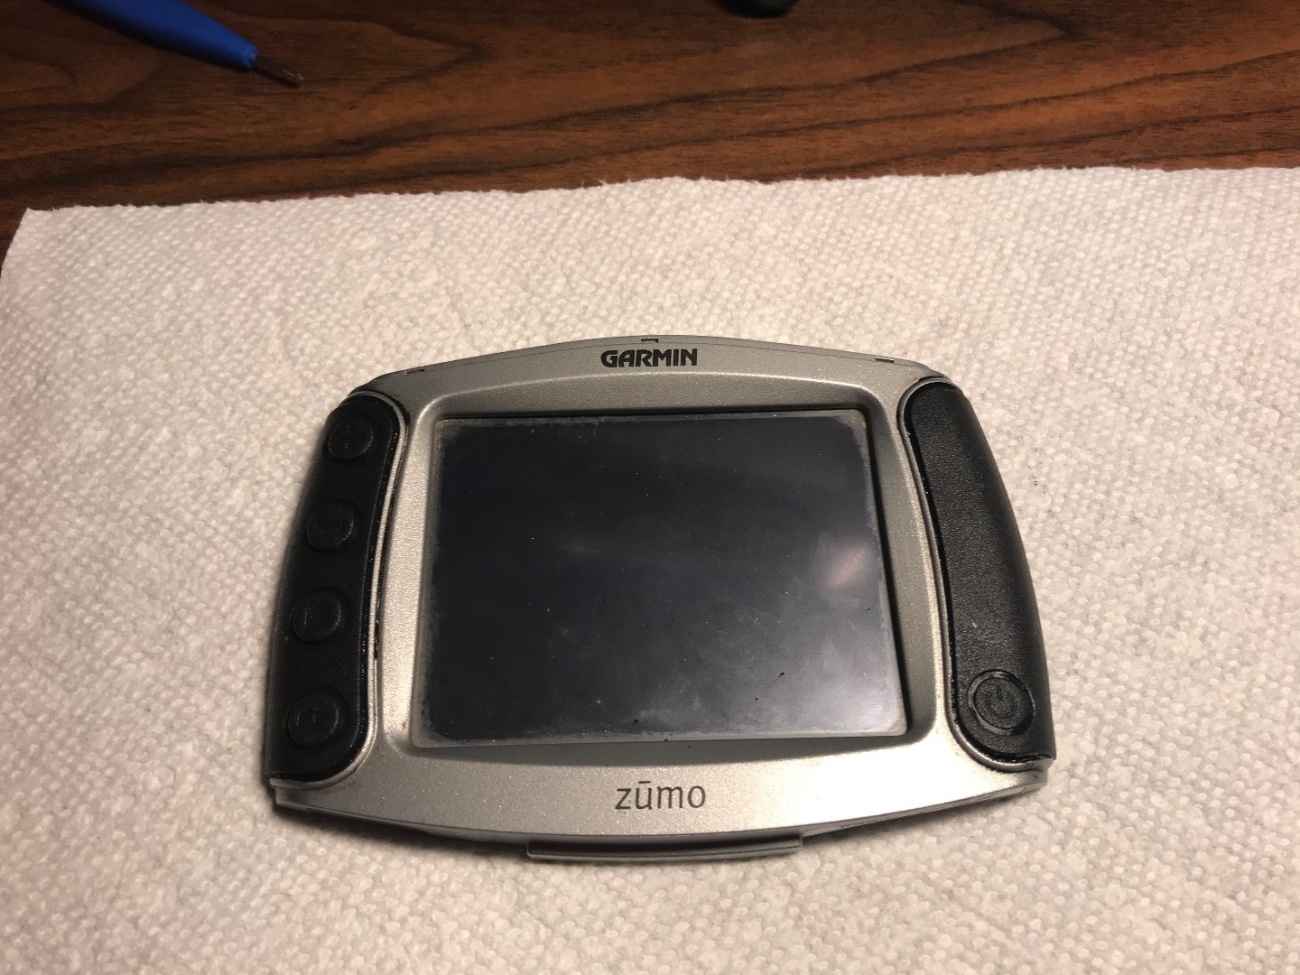
I have to admit I am impressed with how accurately these replacement pads are made. They fit perfectly.
I let it cure overnight.
I found re-attaching the ribbon cables challenging. It's a matter of very carefully sliding the cable into the holder making sure it lines up perfectly before clamping the lever down. It took me a good 20 minutes before I finally got the two cables seated.
It's suggested to test the unit before screwing everything back together. To my surprise it worked the first time.
The replacement keypads are still available on Ebay. They are quite expensive given they are just some pieces of rubber but compared to the cost of replacing these units at least in my context the cost is well worth it to me.
Garmin Zumo 400 - 500 - 550 Replacement Rubber Keypads on/off power button | eBay
Garmin Zumo 400 - 500 - 550 Replacement Rubber Keypads on/off power button | Sporting Goods, Outdoor Sports, Camping & Hiking | eBay!
https://www.ebay.nl/itm/31264791108...
As a side note, my friend Yun pointed out that there's a repair service that he's had good luck with which may be an option to consider:
Garmin Zumo 450 & 550 Repair Service [Garmin Zumo 450 & 550] - $28.95 : PalmDR.com, PDA Repair Done Right!
PalmDR.com Garmin Zumo 450 & 550 Repair Service [Garmin Zumo 450 & 550] - OVER 360 Zumo Units Repaired in 2017 Express Repair Service Instructions This is the Garmin Zumo 450 and 550 base repair, it includes the parts and services selected below(check boxes), return shipping options will be given near the end of the checkout process. You can
https://www.palmdr.com/cart/garmin-...